Neutral & Cozy: Our LA Living Room Makeover
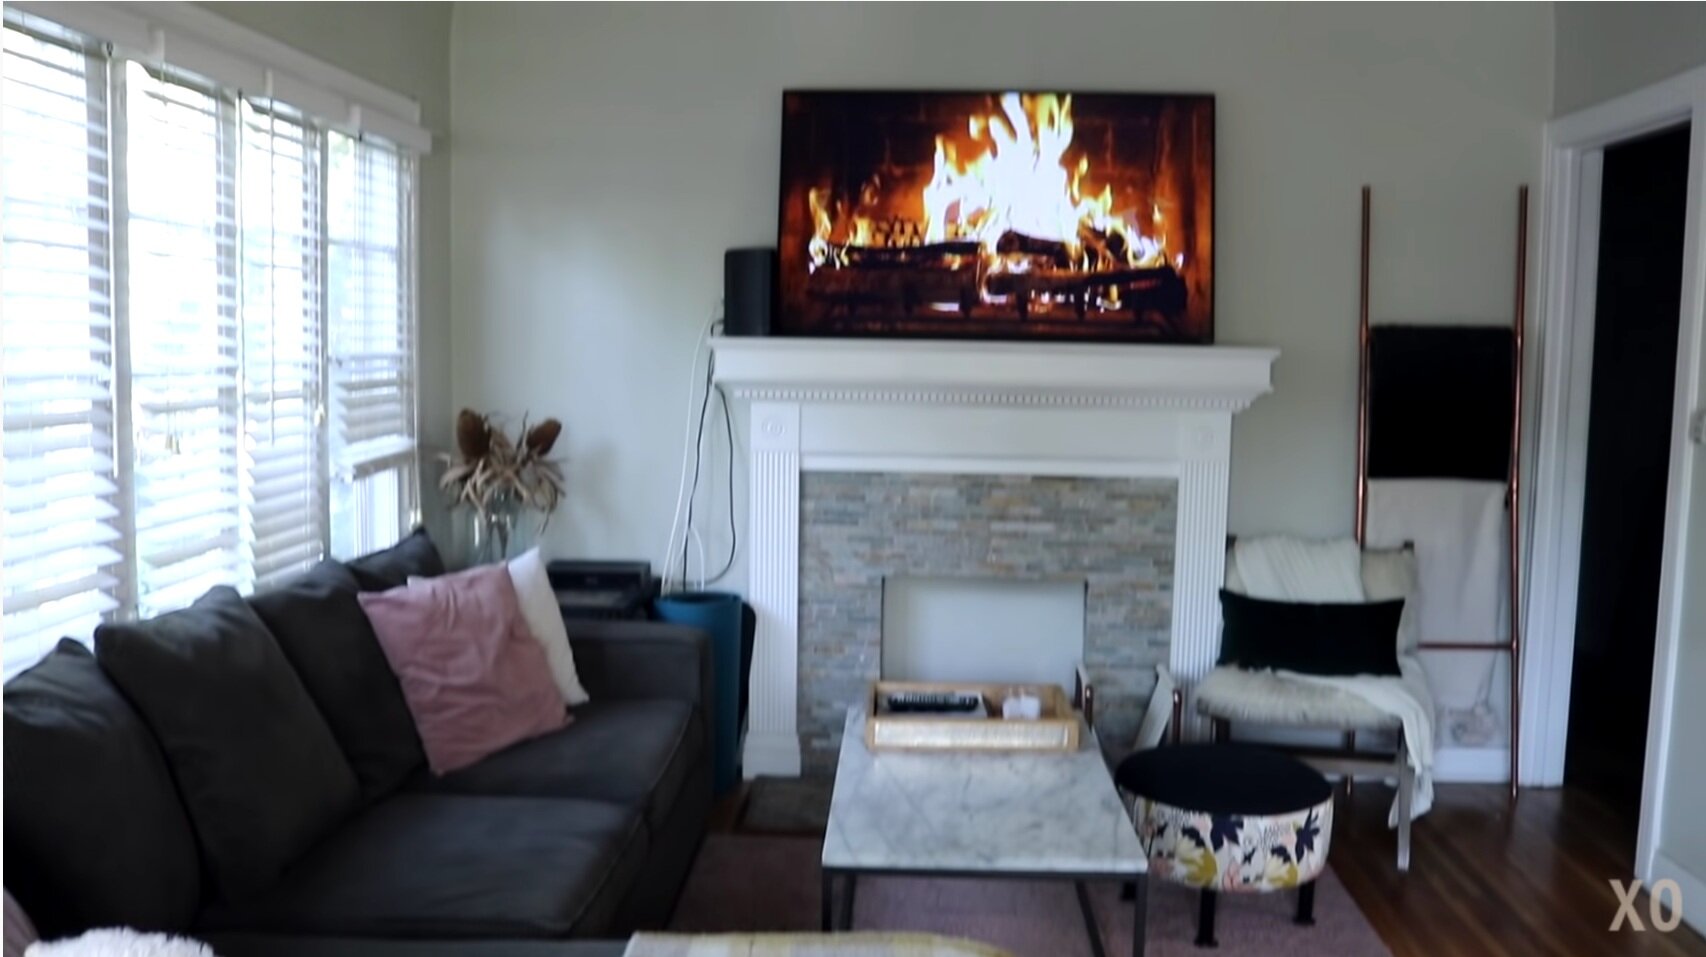
Our LA home was a challenge to decorate and style, but through out 2019 & 2020 I made it my mission to transform each space into a cozy, warm and inviting home for our family. Our living room has loads of windows, a LARGE faux fireplace mantel (that was put in by our landlord) and entryways to different parts of the home - closet, kitchen and hallway to the bedrooms/bathroom. All of these elements, and the lack of wall space, made it difficult to decorate but look at her now….

This was actually the third makeover for our living room .. haha I know! As my style evolved and we saved more money to invest in the space we went from my college furniture to pieces that will last us made homes to come. The first living room makeover in 2019, (WATCH HERE) I really challenged myself to use the furniture that we had and DIY some small decor items to liven up the space, especially since we had a very tight budget.
Before and After…

Although I loved this space, it still wasn’t quite what I wanted and felt very “fall” or seasonal … not timeless. Here was my “MUST HAVES” for the new design…
Brighten up the space while still keeping it warm and inviting
Instead of bold color, incorporate loads of texture - a neutral palette with black details.
Make more use of the space (so when you're sitting on the couch you can actually see the TV)
Get a TV we can actually mount!!
Make the living room and entryway separate spaces while also complementing each other (Watch the ENTRYWAY MAKEOVER HERE)

Modernizing our Window
I had a dream that I painted the window trim black so that’s exactly what I did lol. In my dream it was BEAUTIFUL and I just had to have it. So I selected a black paint color from Sherwin Williams - TRICORN BLACK in a satin finish so it was more durable. (Shop HERE).
I started by taking down the existing blinds and attempted to remove the many layers of paint already on the trim (from very poor previous paint jobs). For the glass, I used a straight-edge razor to remove the paint. Then used a sander for the trims and a sanding block for the parts of the framing closer to the glass so I didn’t scratch the glass. Once I finally smoothed out the trim and cleared all the residual paint from the windows, I took a dry cloth and wiped it all down before I painted. This is an important step to remove the sanding dust and debris so it doesn’t get in the paint.
I tried the straight-edge tool method to paint the trim which DID work but since there were so many small window panes, I’m not sure I saved any time and would have probably been quicker to tape off the windows. To get good paint coverage I applied two coats!
Words can express how much I LOVE how the black trim on these windows. It not only provided a huge modern upgrade but also visually separated the spaces between the entryway and the living room.
Tip: For striping paint from hardware I used stripping gel. I let the hardware sit in the solution for about 10 minutes then using a pair of gloves and a paper towel I was able to remove the paint easily.
Updating Our Couch
One of the biggest issues we had with the room was the couch. It was starting to wear out, dark in color, and wasn’t the proper shape for the space. Since I also wanted to brighten the space I wanted the couch to be light and airy. The best couch shape for our space was to get a modular L-shaped couch where you could sit on the part of the couch and see the TV instead of looking into the kitchen. The pieces could also be moved around like a puzzle so if we ever needed to modify the couch for a future home we could. After doing some shopping I found the couch of my dreams! It checked off everything I had on my list. The couch is comfortable and has clean modern lines for a timeless look! (Shop my couch HERE).


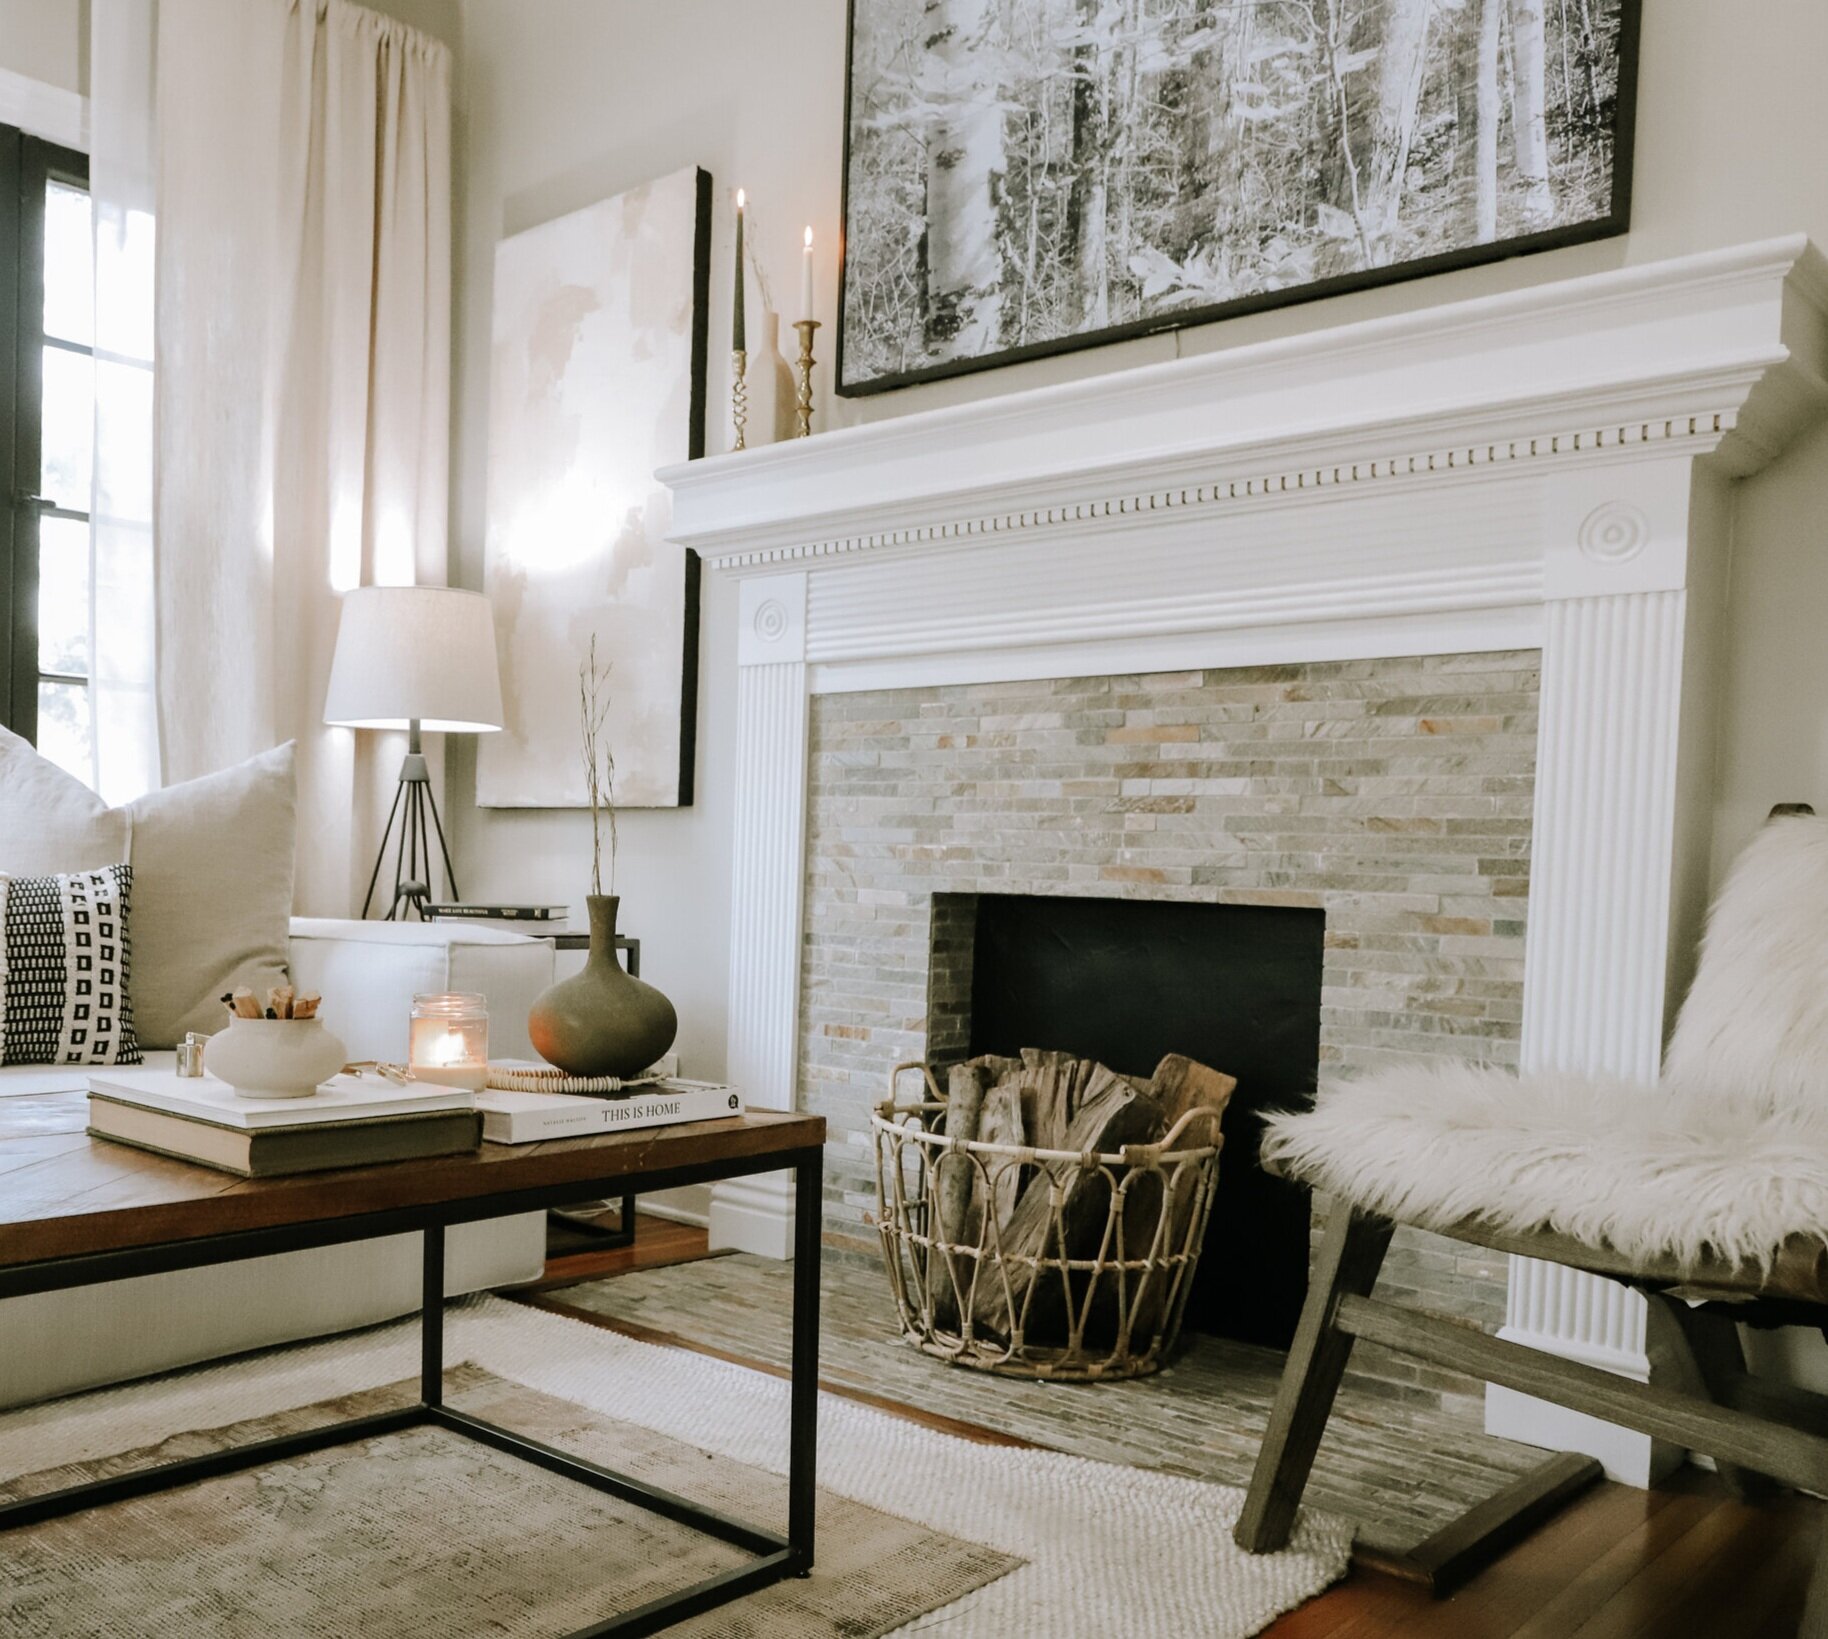
Refreshing our Faux Fireplace and Mantle
In my last living room makeover, you guys suggested that I should paint my mock fireplace black inside to make it look more realistic. LOVED that idea!! I used only one coat of chalkboard paint to give it a matte chalky finish. Tip: Pre-mixed chalkboard paint is a much cheaper alternative to buying black flat paint.

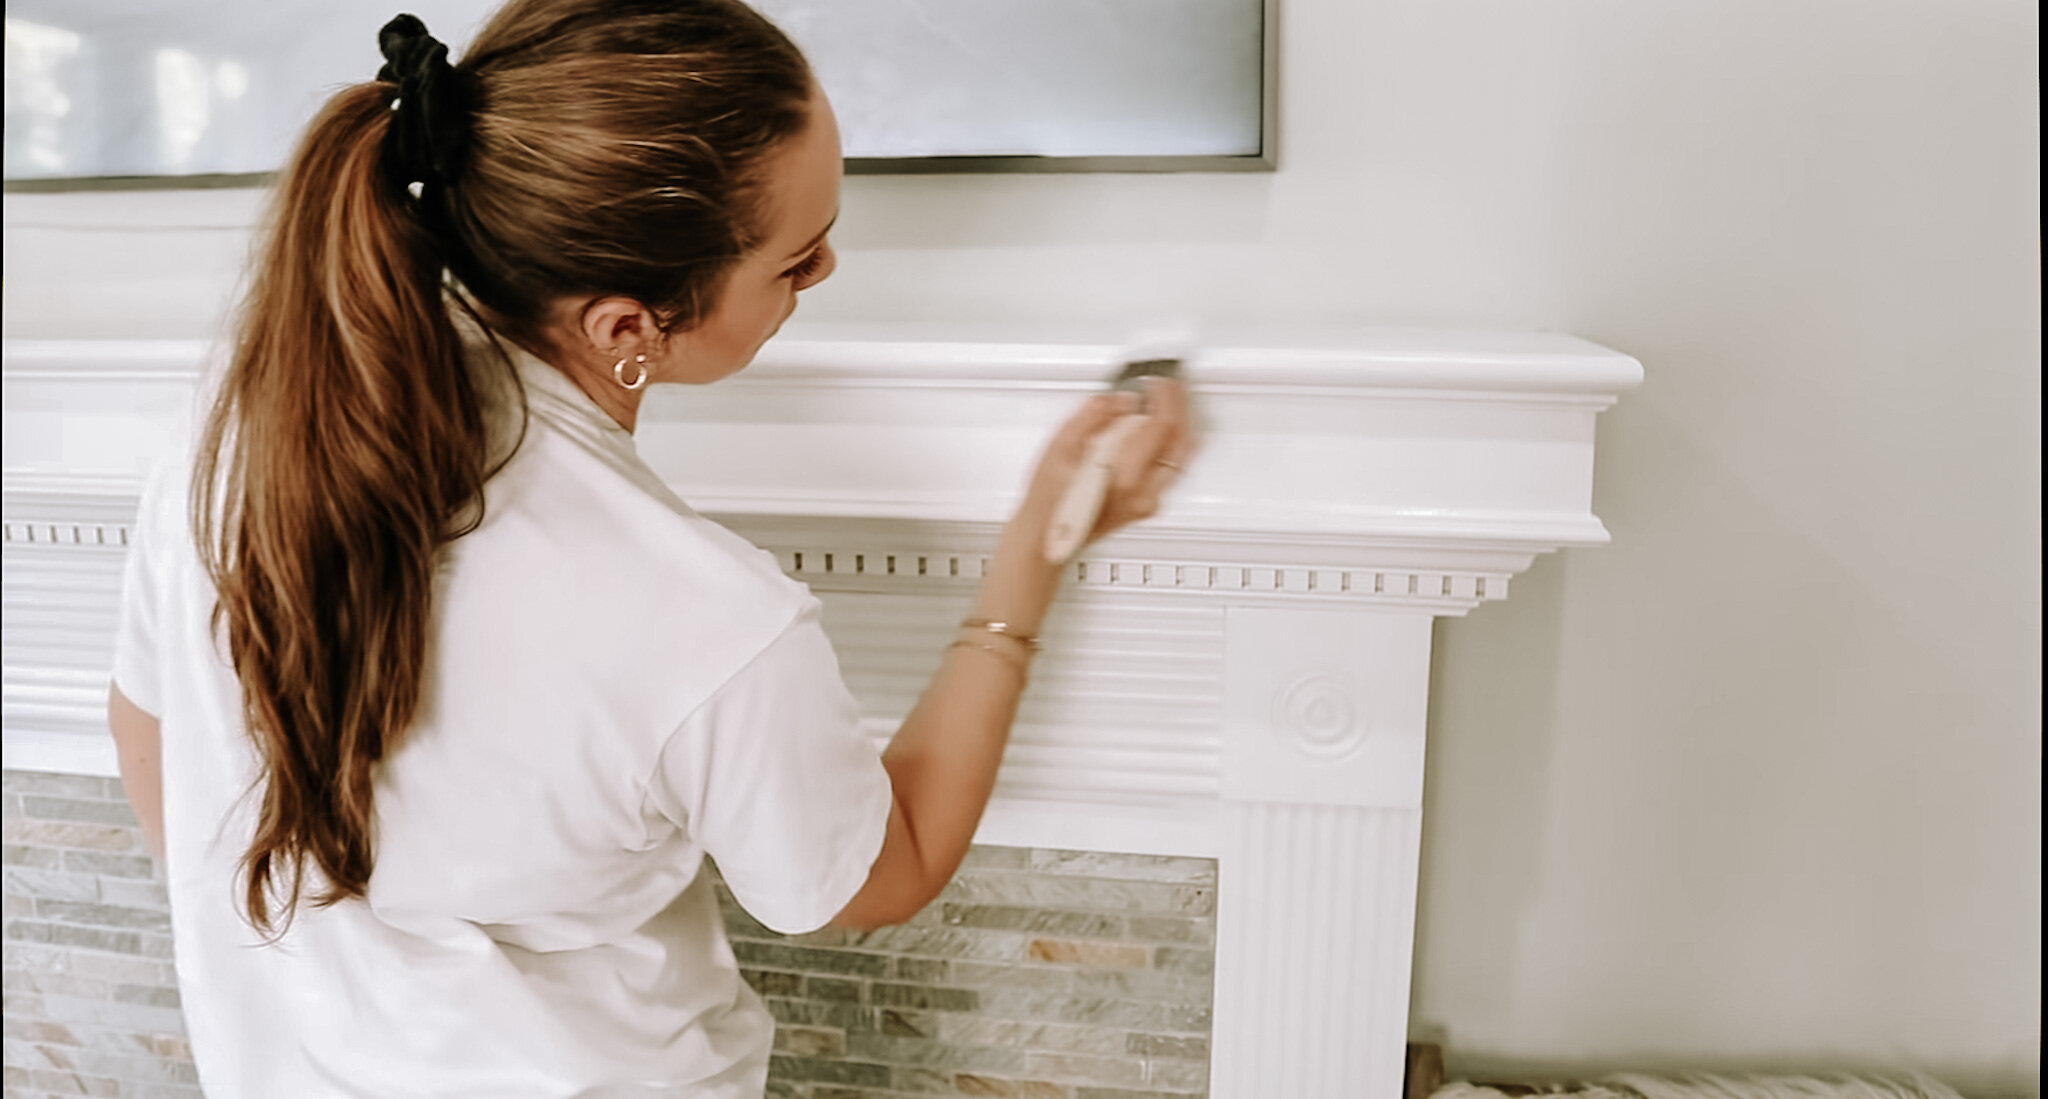
Next, I refreshed the mantle by using some caulk to fill in the gaps and gave it a fresh coat of paint - White Gallery by Sherwin Williams. These small details made such a HUGE improvement to the look of the mantle. Now this area was ready for our much-needed new TV! We decided to move our 60” to the bedroom and get a 55” Samsung Frame TV for the living room. The size fits much better and I love that this TV turns into art once off so it’s not just a black square above the fireplace. Shop my TV HERE.

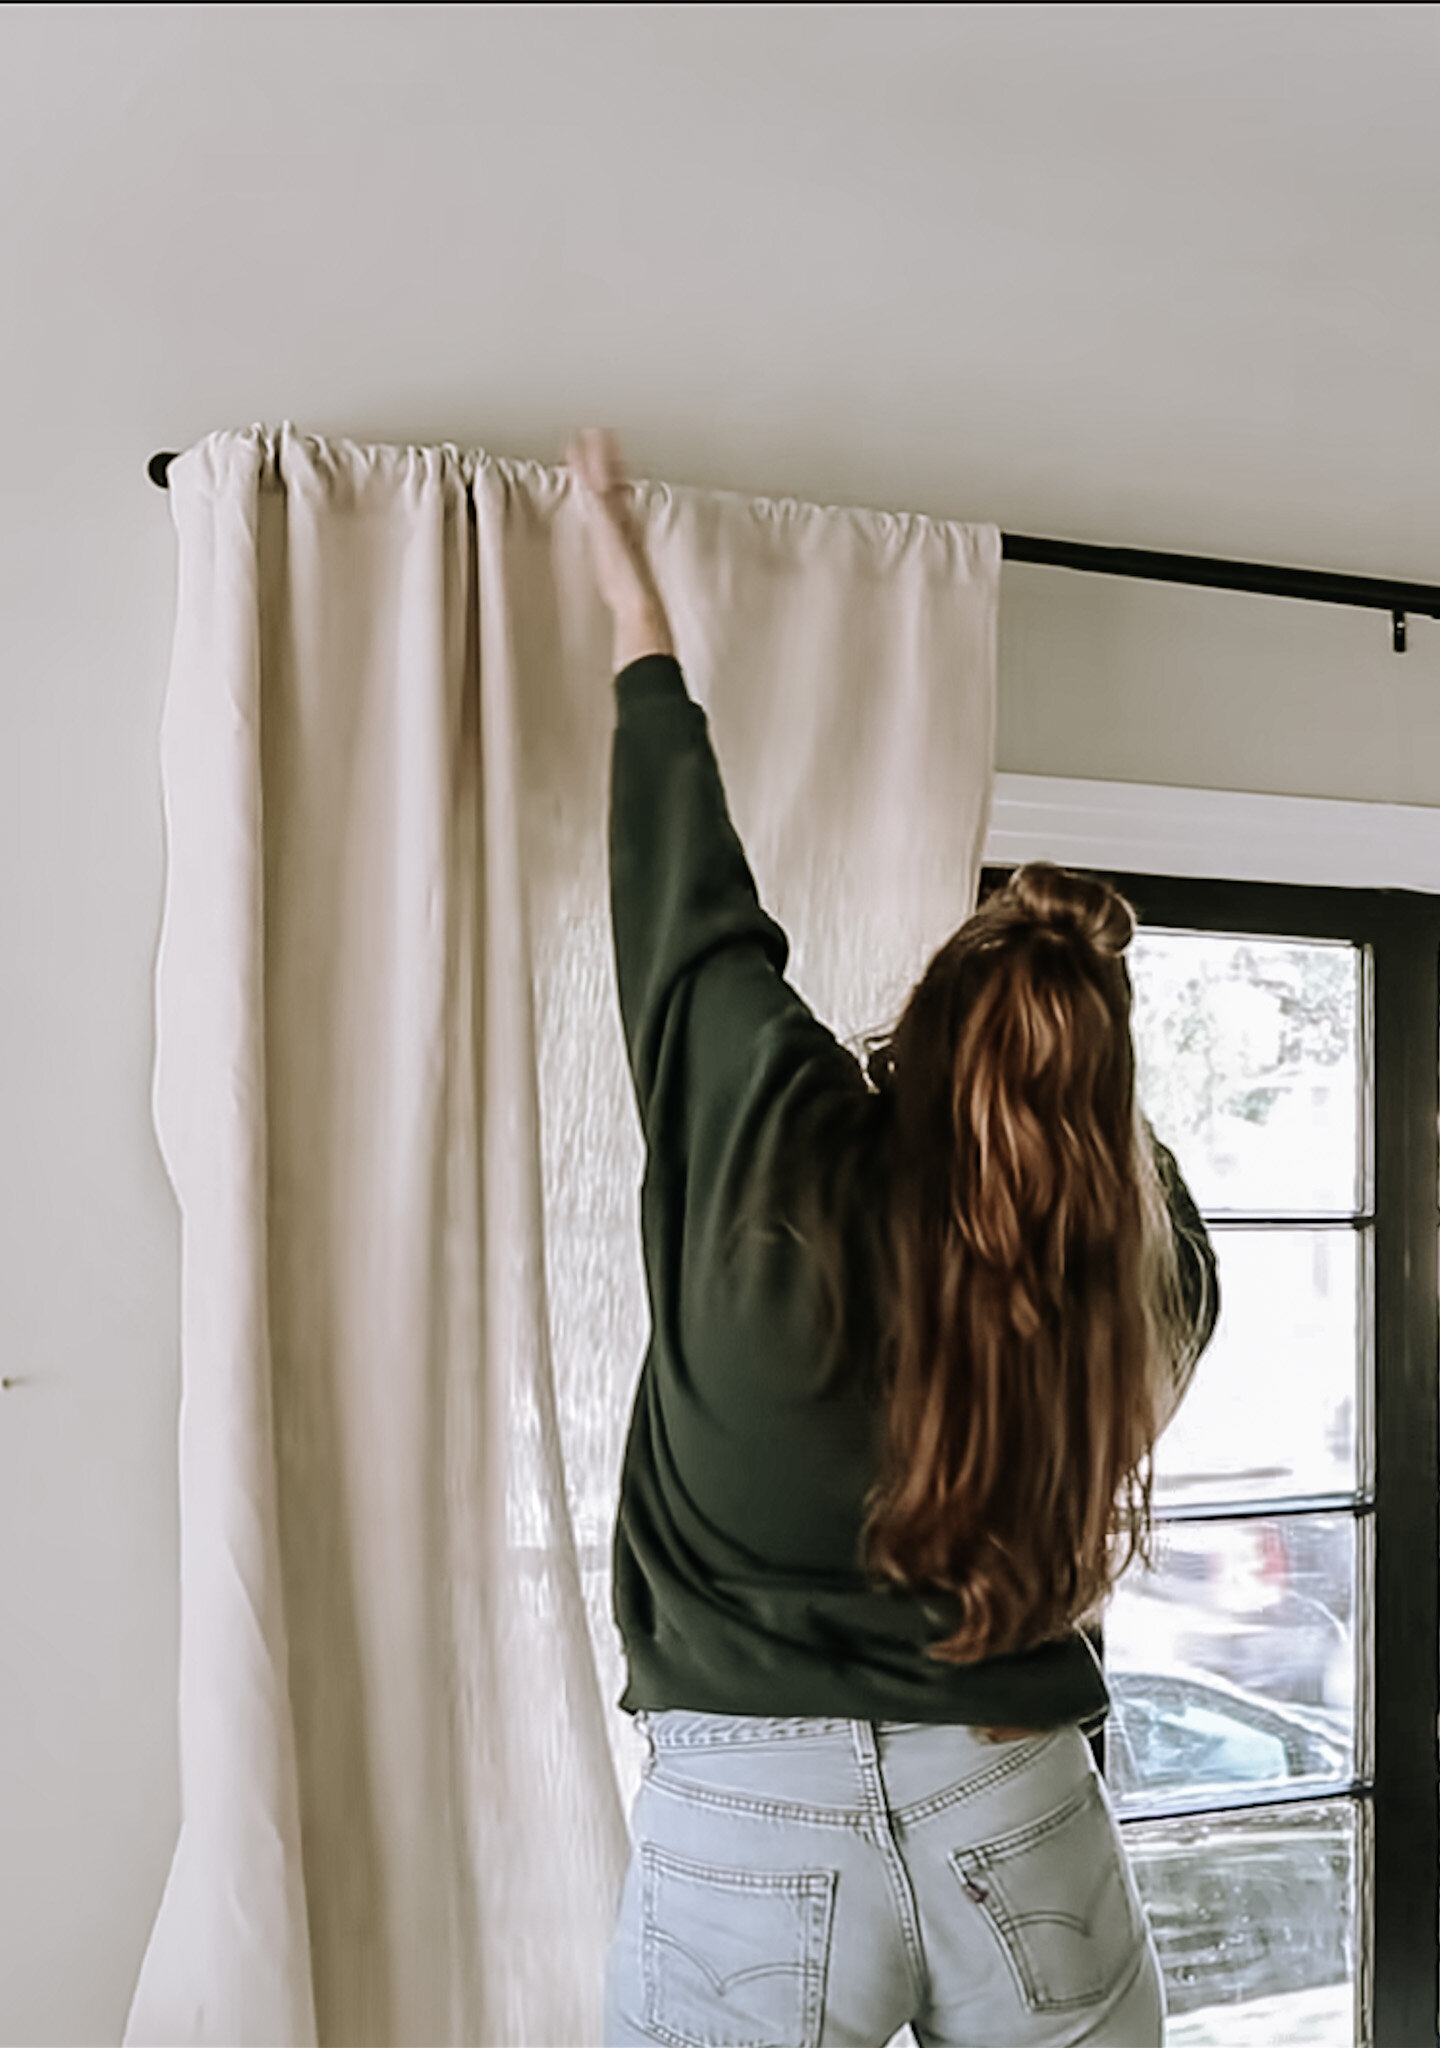
DIY Linen Curtains
I was very particular about the texture I wanted to use for my curtains. I didn’t want the room to feel heavy or dark so I went with a light neutral yet slubby linen for the curtains. I took a trip to my favorite home fabric store in LA F&S Fabrics and picked up 5 1/2 yards of linen I was going to need.
Making curtains is pretty straightforward. All you need to do is:
Cut the fabric (length of curtains + hem/seam allowance)
Hem the sides first (I did 1/2” on each side)
Make the loop at the top for the rod. (Take the diameter of your rod - mine was 1” so I made a 3” looped hem at the top to slide the pole through.)
Hem the bottom (larger bottom hems always look more elegant so I did a 2” hem)
Tip: Before sewing any seams, I like to iron my seam allowance so it acts as a guide for when I sew. This makes the processes so much easier and you’ll get a clean hem every time.
Rule of thumb: You always want your curtains to go as high to the ceiling as possible and as low to the floor as they can.
For the curtain rod I went with a sleek double poll rod I found on amazon. I love it because it’s matte black, of course, but also because it gives me the option to add a sheer curtain closer to the window. This allows some sunlight to still come in while still having the privacy we need.


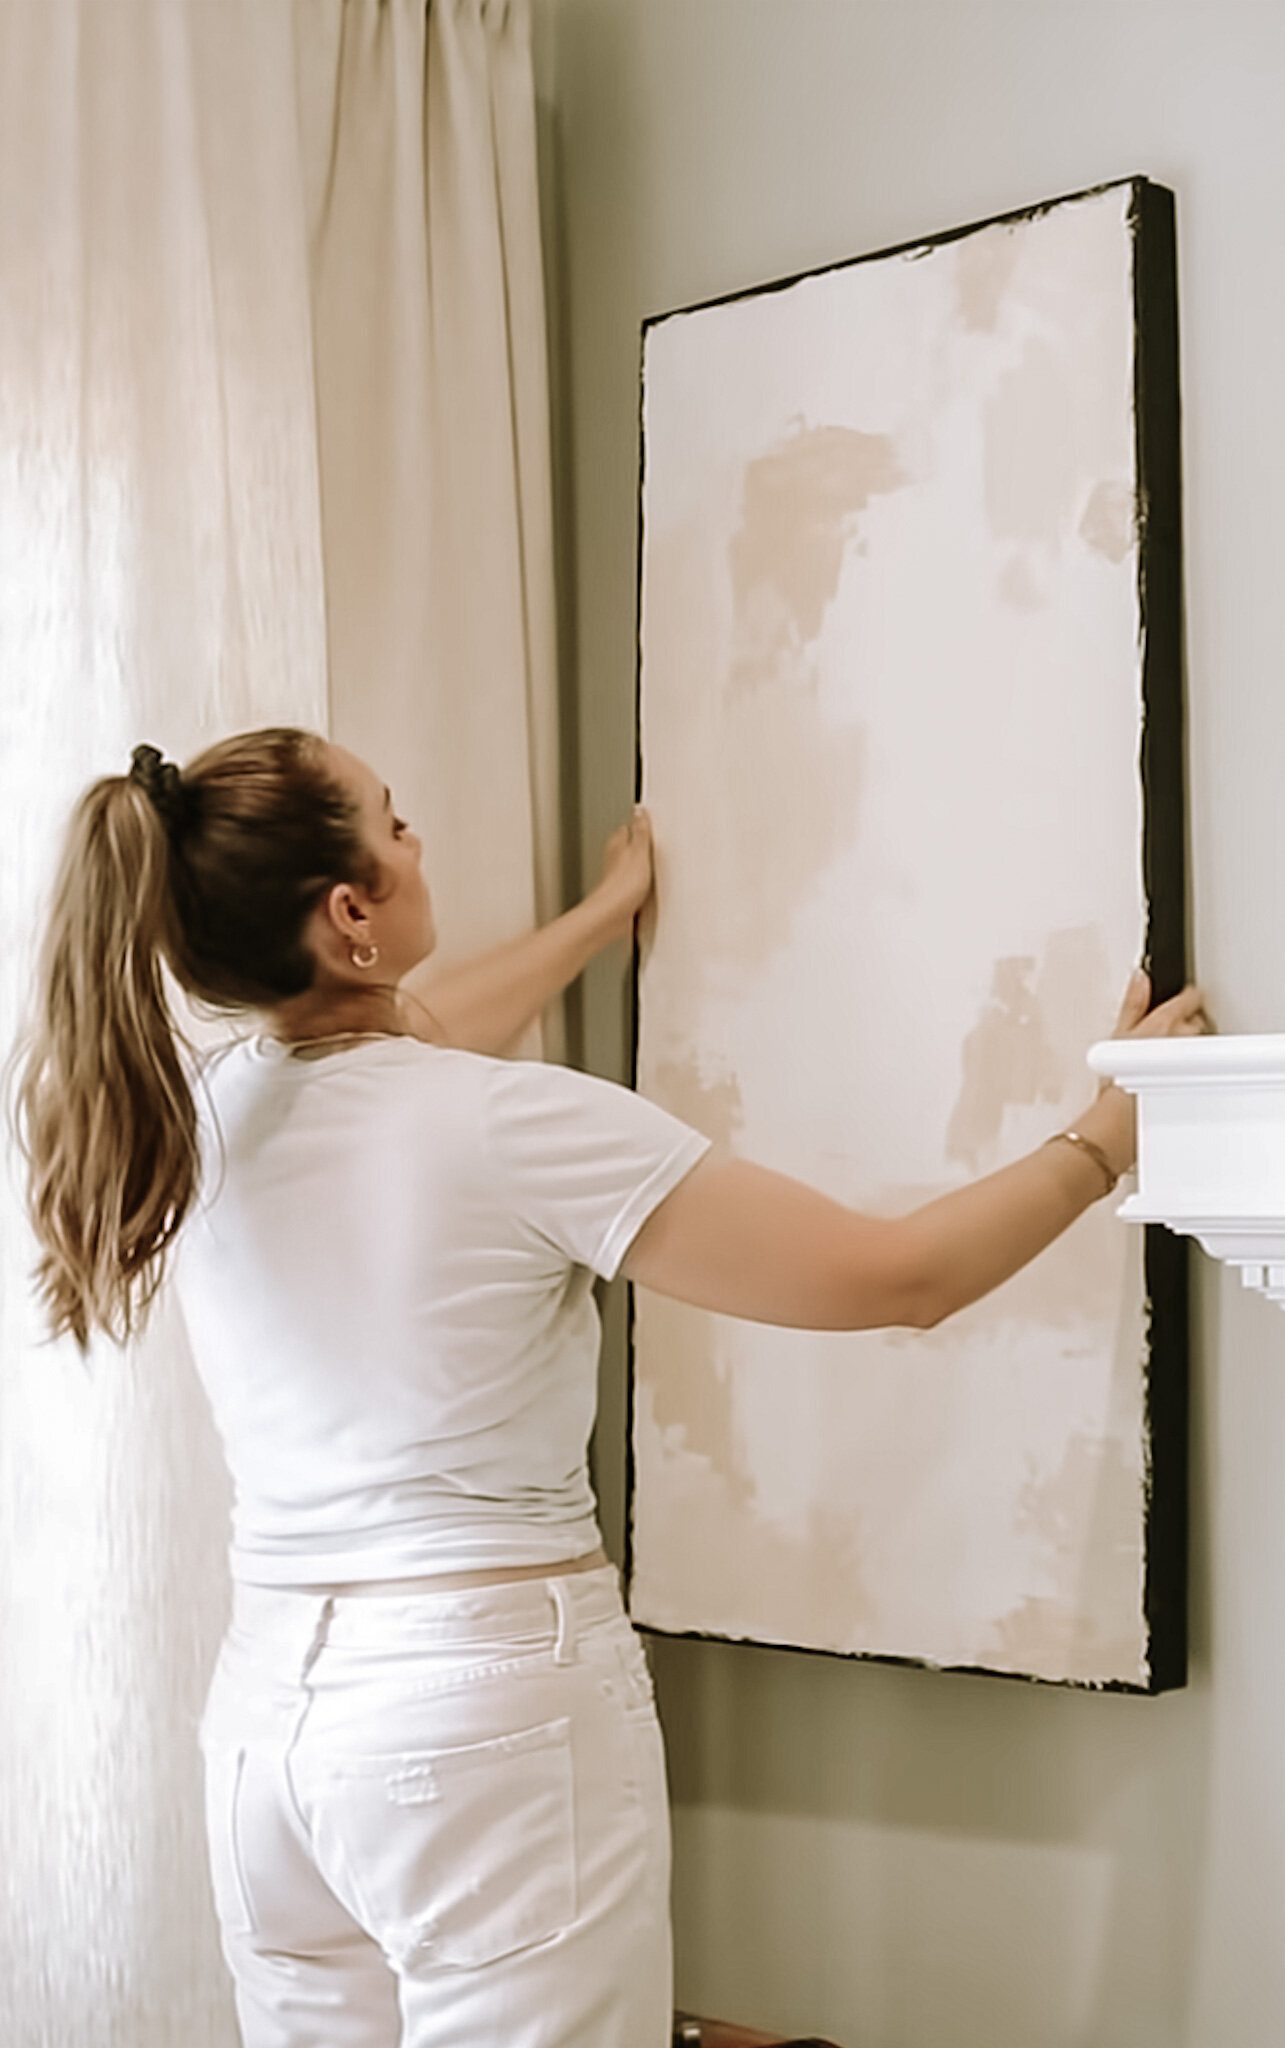
DIY Wall Art
The spaces on each side of the TV definitely needed some art. I knew that it wanted it to be large and dramatic. I went to the hardware store and picked up 2 plywood pieces that already come in 2’x4’ which ended up being the perfect size to hang on each side of the fireplace.
In addition to the wood here other supplies you’ll need:
1/4” plywood (2’ x 4’)
(3) 1x2x4 wood
2” wood screws
Joint compound (HERE)
Palette / putty knife
Paints for the art
First, we need to cut the small pieces of wood for the frame. Cut the 1x2x4 wood into the following
2 pieces at 4’ long
2 pieces at 22.5” long
I screwed these pieces into the 2’ x 4’ plywood using the 2” wood screws.
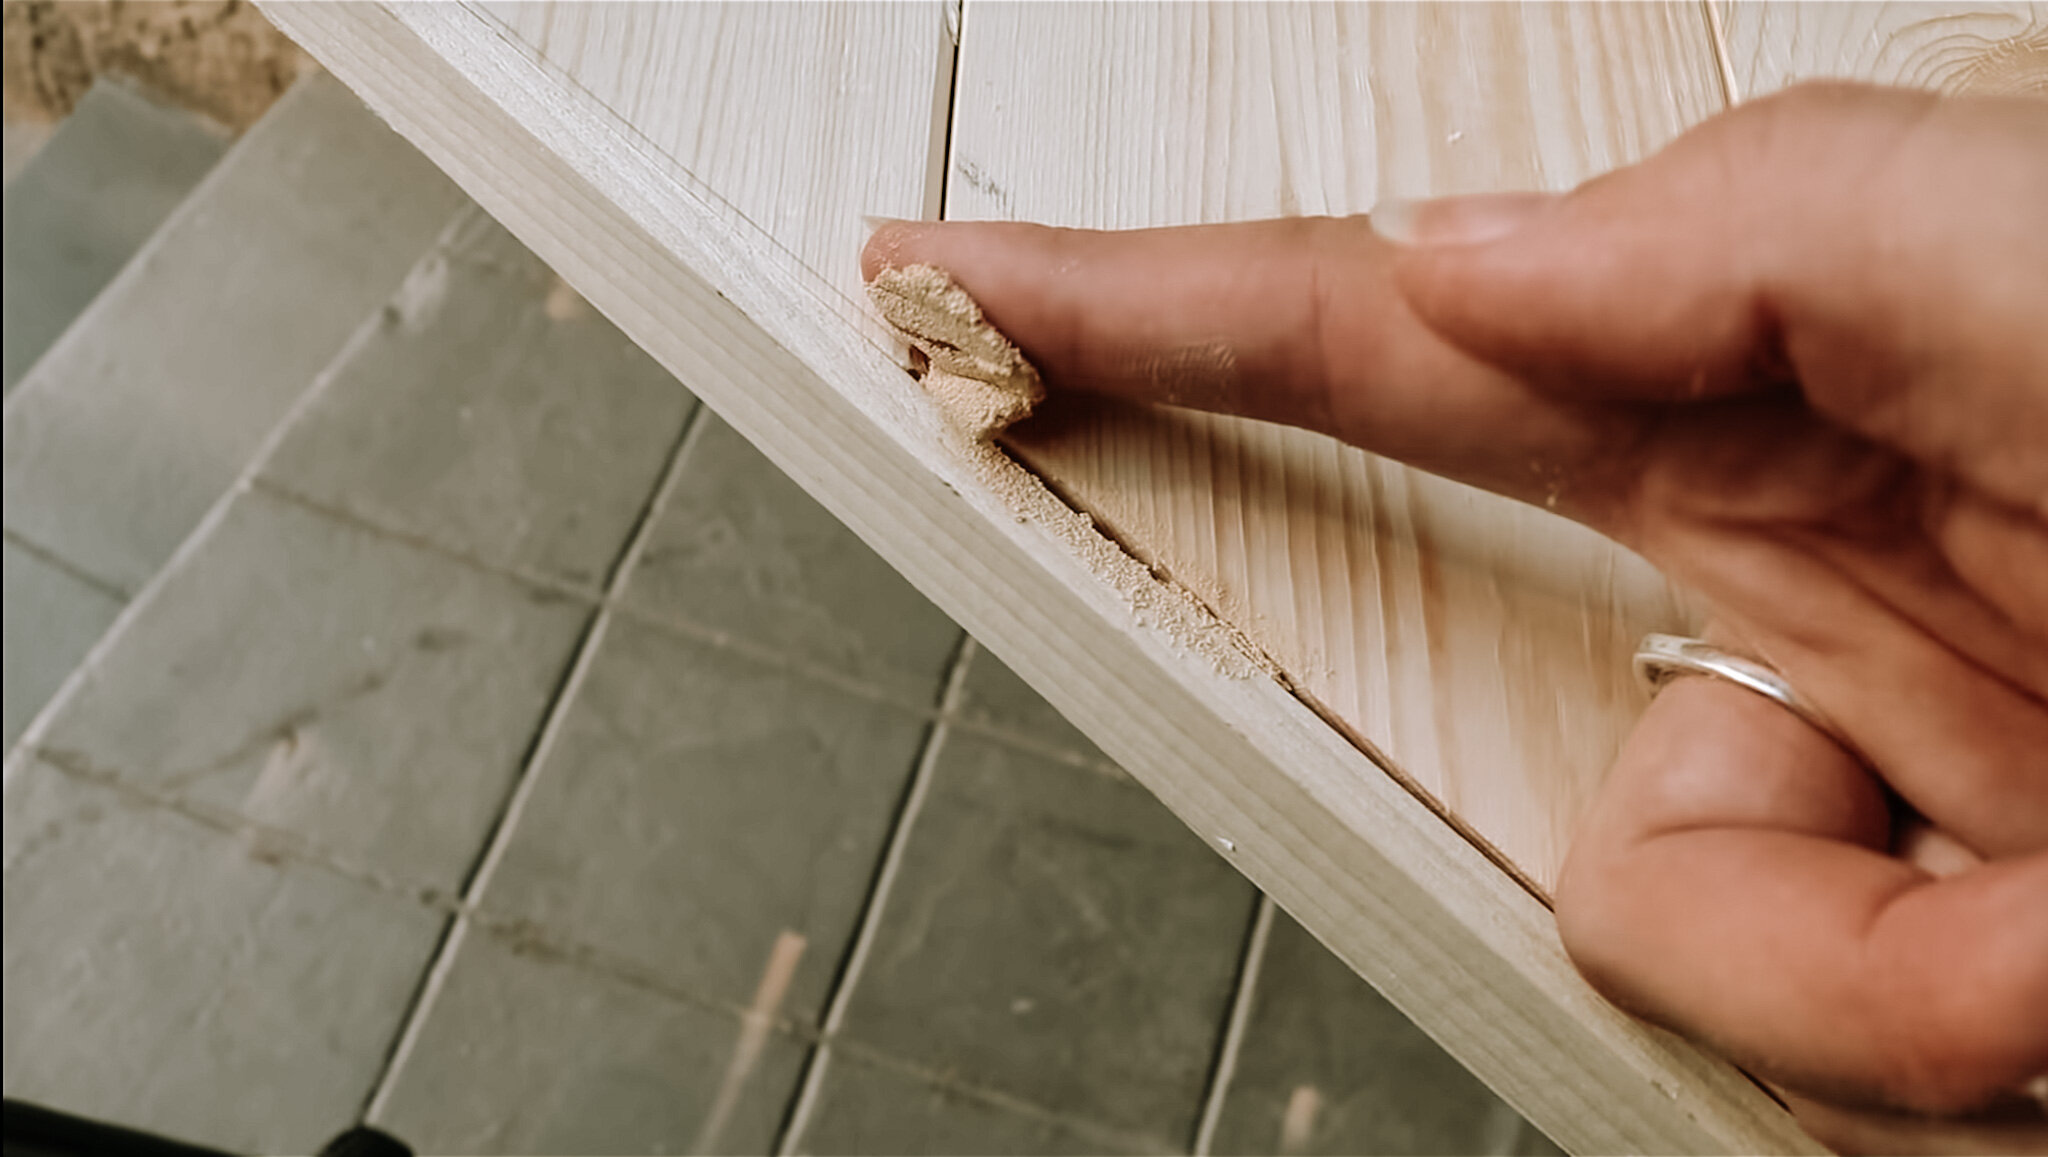
Next, TEXTURE. Start by freely applying the compound on the plywood in all directions making sure the application of the compound is heavy and textured. I let the first layer dry and added a second coat of compound.
To add dimension to the art, I mixed the joint compound with 2 different shades of latex acrylic paint. The first color I used was a sandy-taupe color while the second one I used was lighter but NOT too white. There really is no trick or method to applying the compound. I just went wherever I felt the color needed to go while also giving it really rough texture.
To add depth and dimension to the art I trimmed the edges in Tricorn Black paint. It helped prevent the art from looking like it was floating.
Coffee Table Flip


I had a marble coffee table for YEARS and since I wanted to warm up the space, marble was looking really cold to me. Since the slab of marble was just sitting on top of the frame, I decided to DIY a new topper and keep the frame! A warm wood tone was going to be perfect.
I went to the hardware store and picked up several 1x4 pieces of wood and a 2’x4’ sheet of plywood.
I cut the plywood to the exact size that I needed for the coffee table
I sketched the wood pattern design I wanted for the topper and then started cutting. I placed a piece of 1x4 wood diagonally on the plywood and marked where it needed to be cut. I cut one piece at a time making the process kind of like a puzzle. (I used my miter saw to cut on a diagonal.)
Using wood glue, I adhered each wood piece to the plywood.
To finish off the edges, I used a thinner piece of wood to frame the table using wood glue and brad nails.
Using a stainable wood filler, I smoothed out any imperfections around the edges and sanded it down once that dried.
I removed all sanding residue with a clean cloth and stained the table using a shade that matched a bookshelf in my entry-way. I used the stain English Chestnut which complemented it perfectly!
Finally, I used three coats of a flat polycrylic finish. Make sure to let it dry overnight.
I absolutely LOVE how it turned out! It definitely achieved a warm look for the space.
Styling
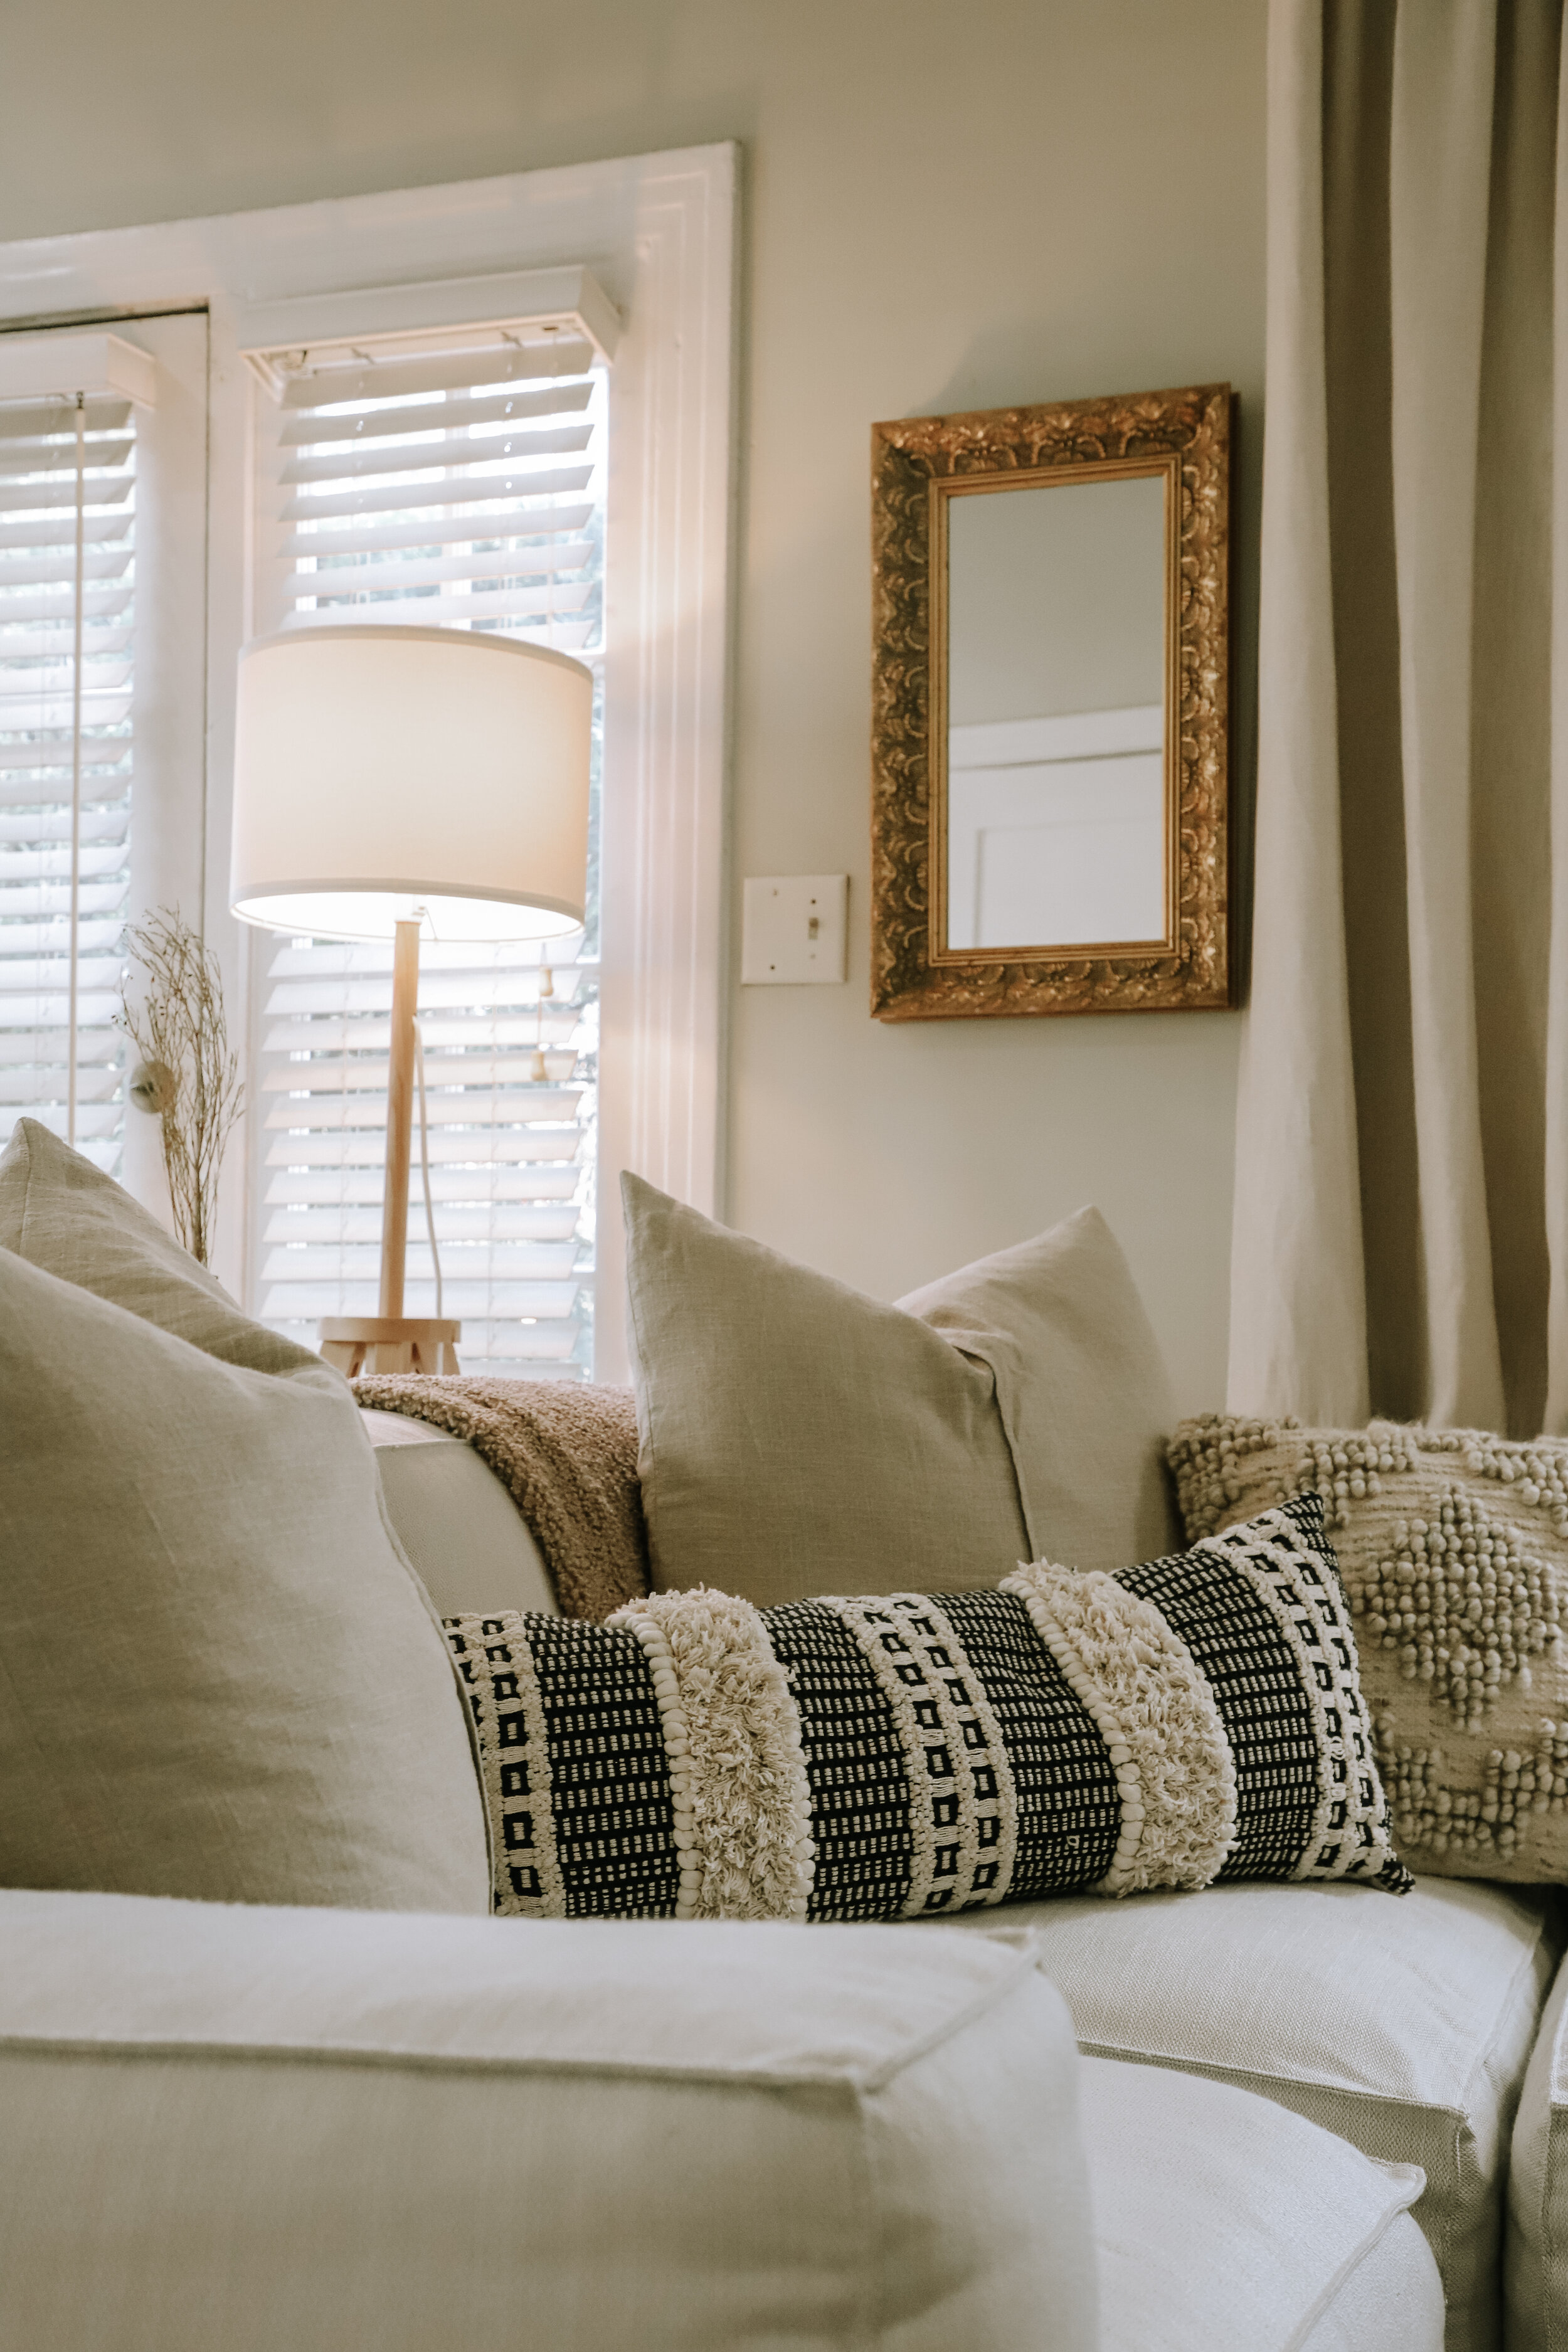
When it was time to style the living room, I made sure to really keep with my inspiration of neutral warm tones with black accents. On the entryway side I hung a stunning ornate mirror that I had found at a flea market. It was the perfect decor piece to tie in the vintage good look from the entryway.
I found an iron black lamp from world market that worked perfectly for the side table. I wasn’t a fan of the shade it came with so I swapped it out for this one.
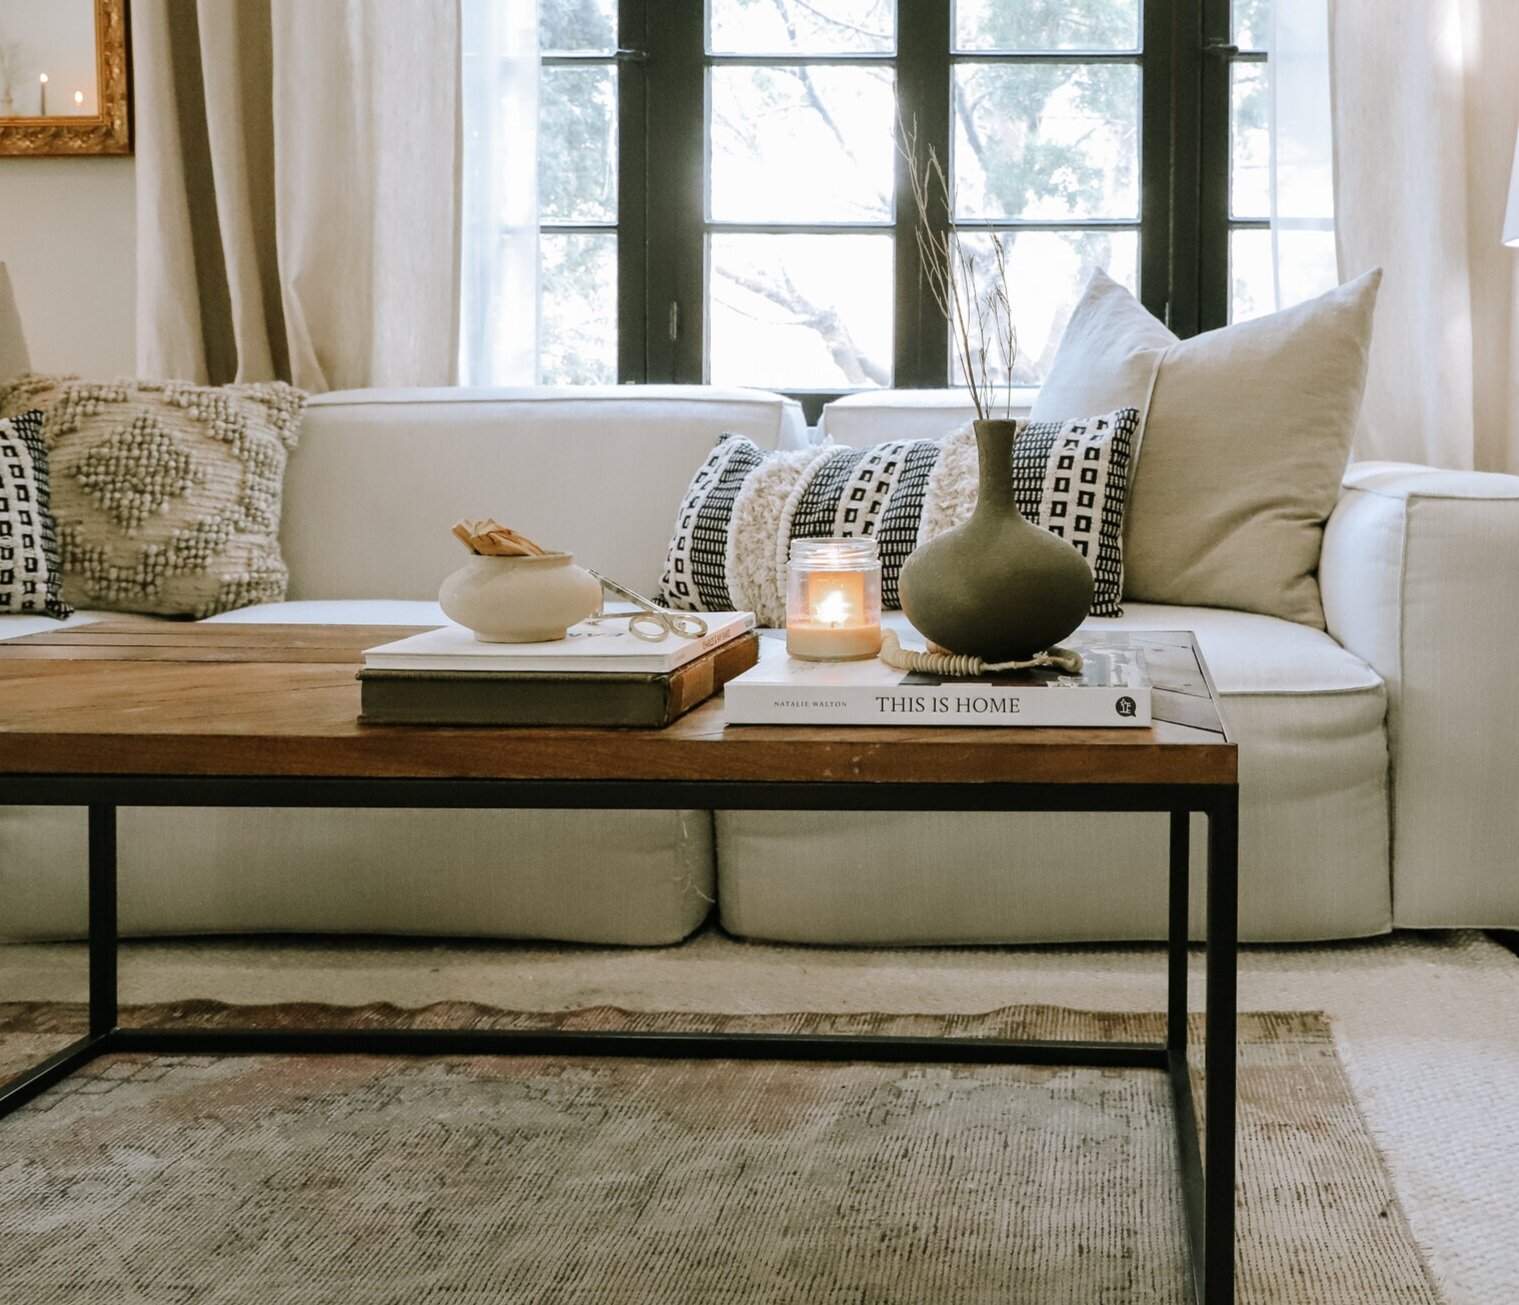
You all know how much I love elevating a space with pillows. I had previously DIY’d European Linen Pillows (click here for DIY) for my bedroom so I made 3 more for the couch. I found a linen fabric that was a warmer color than the couch and curtains but still in the same color family. I also found an amazing lumbar pillow at Home Goods (shop a similar style here) and 20” pillow at Walmart. They were the perfect shape, texture and color I needed to bring in some warmth while keeping the space light and neutral.
For the mantel and coffee table, I DIY’d some gorgeous vases using the faux ceramic stone hack using baking soda and paint. (Click HERE for DIY video). I also decorated with thrifted books, candles, and to add texture, I used a strand of beads I found at the flea market and added palo santo wood and matches to the small ceramic vase.


When a space comes together this well I find myself just starring at it all the time hahah! I am blown away by how luxurious the window black trim makes the space look and especially proud of how many DIY’s I was able to make for this space! WATCH THE VIDEO below!
XO MaCenna