Renter-Friendly Kitchen Makeover (on a budget)
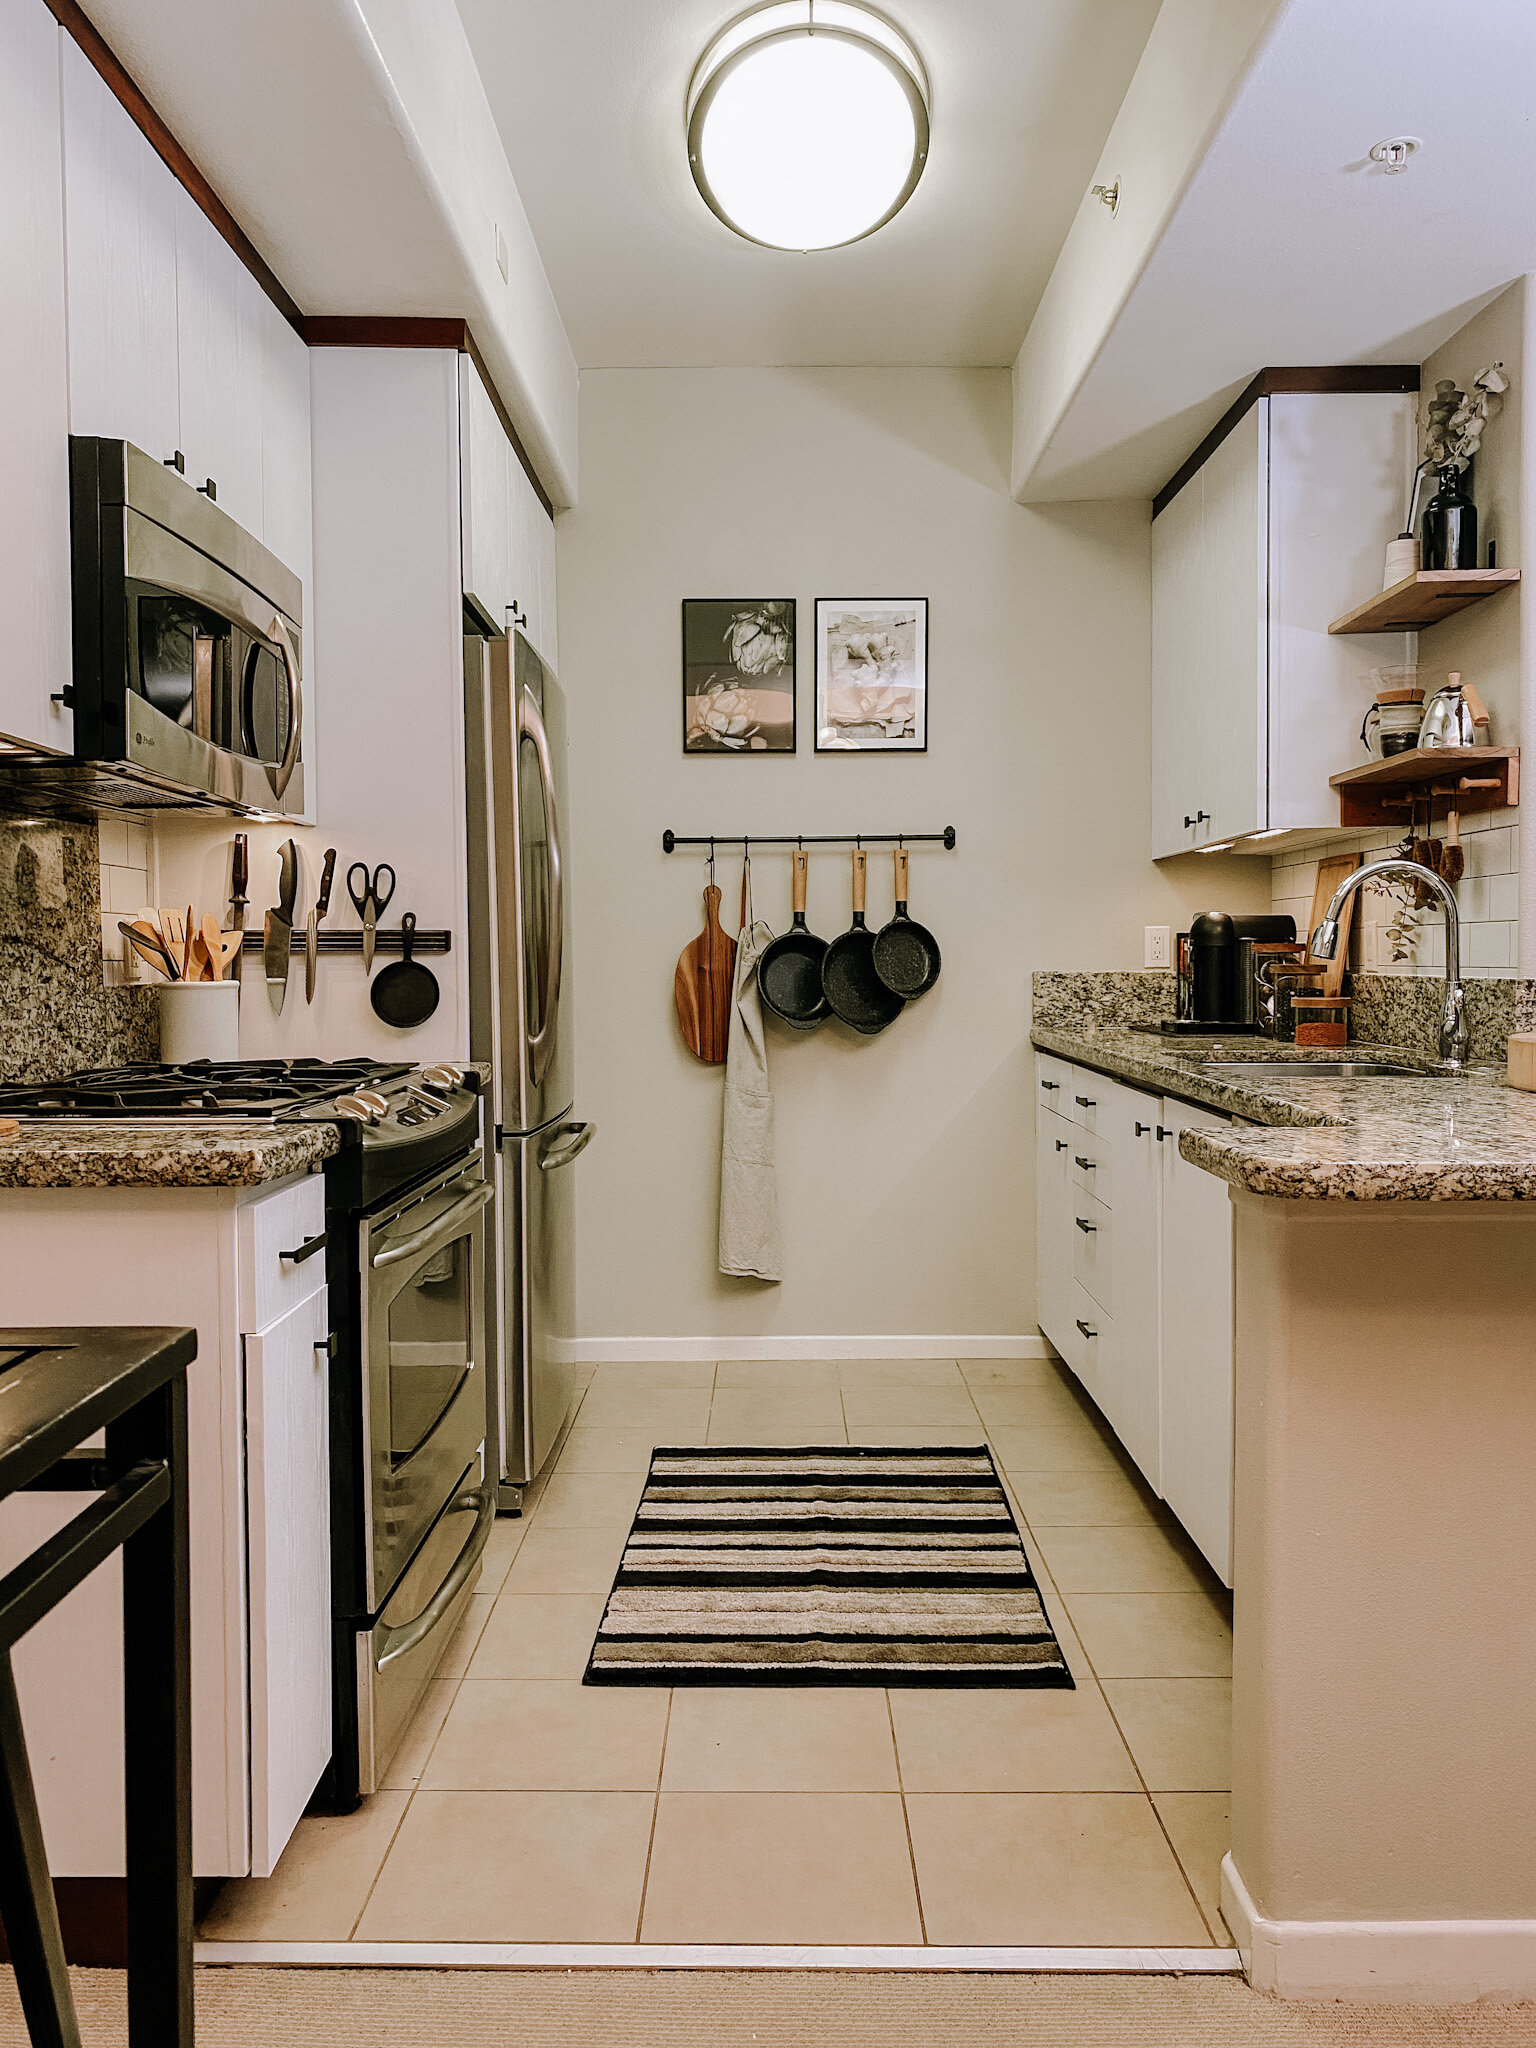
This Kitchen Makeover was such a special project to work on for Romeo’s sister and her wife. I’d previously redesigned their bathroom (watch here) so I took inspiration from that space to carry the style throughout their home. Although their kitchen is open to the dining and living areas it has no windows so one of the main issues they wanted to address was lighting. The lack of sunlight and dark wood cabinets made the space felt dark and heavy. Like Romeo, his sister is also a Chef who spends a lot of time in the kitchen so it was important to make sure the makeover accommodated her needs both functionally and aesthetically.
Before
Contact Paper Cabinets
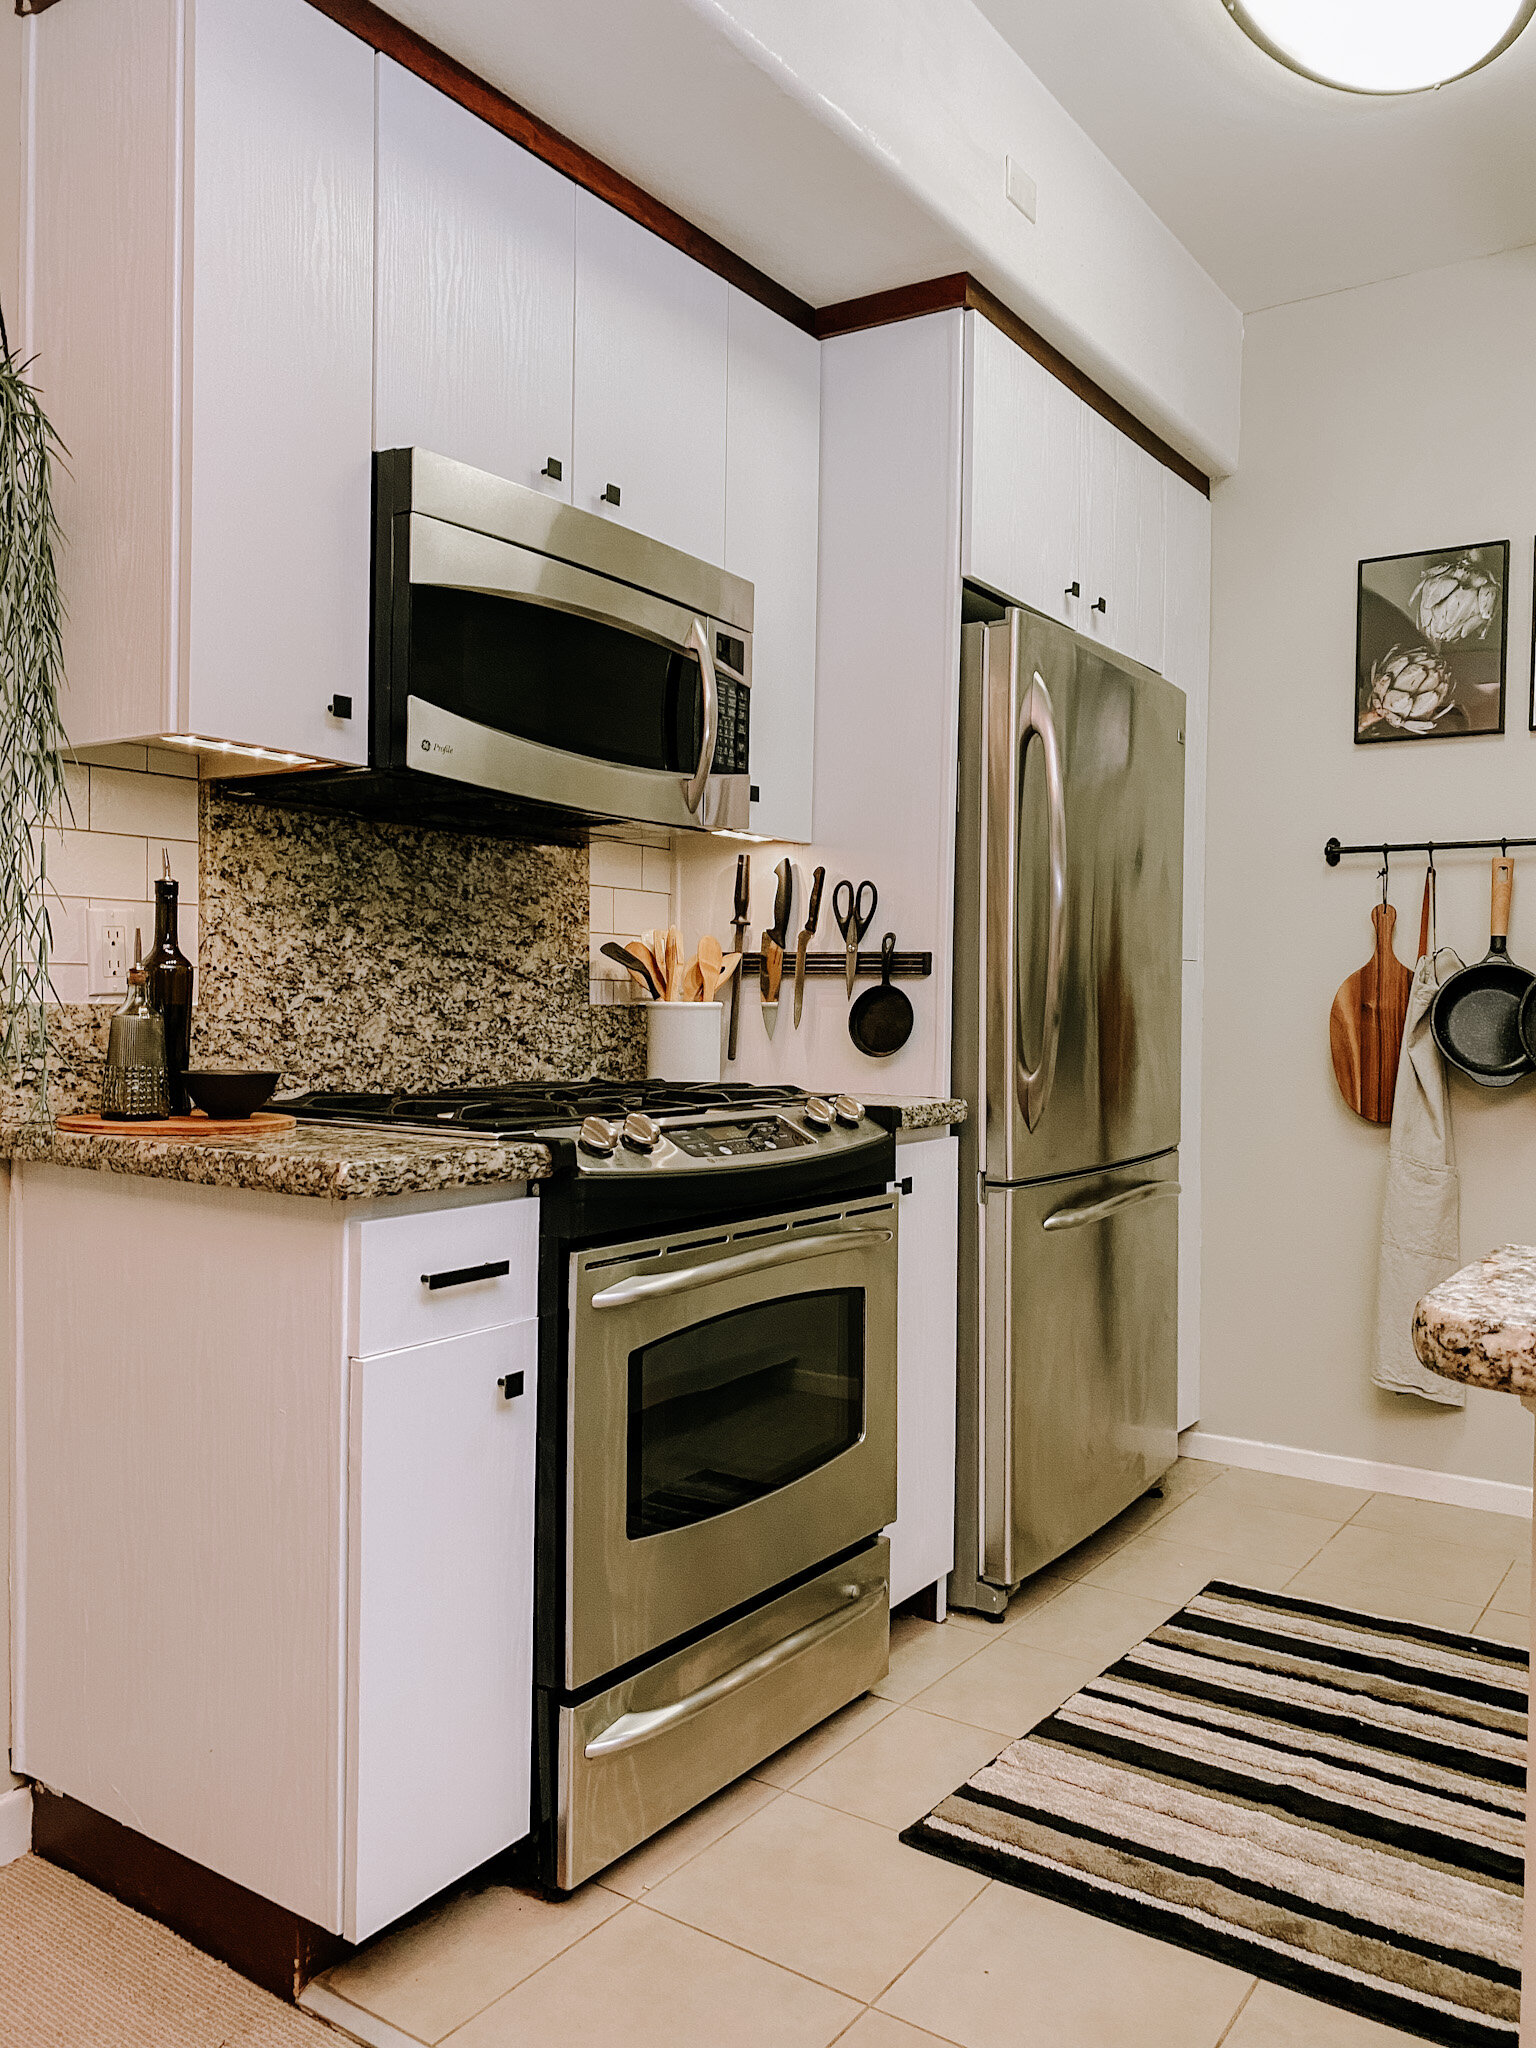
One of the first things I tackled to make their space feel brighter and more open was the cabinets. I couldn’t make any permanent changes to the cabinets since they’re renting the home —so, I improvised with a renter-friendly hack of covering the cabinet doors and exposed sides with contact paper!
I like to have options (especially color options) when choosing materials for a room! I wanted light-colored contact paper for the space so I ordered two color options to test out, pure white and off-white. It’s important to visualize how all the elements (i.e subway tile and cabinet hardware) are going to look together and also how the color will look with the light that already exists in the space. After testing out the options I decided to go with the pure white contact paper because the off-white had a bit of a pink undertone. I also swapped the silver hardware for black hardware which tied in perfectly with their appliances and countertop.
This hack is definitely not for the faint of heart! The process was definitely time-consuming and required lots of patience, but let me tell you… the end result, WAS WORTH THE EFFORT!

Wall Paint & Tile
There weren’t many walls that needed to be painted so just to freshen it up I used Haven of Coziness by Clark + Kensington which is throughout the rest of their home as well. I’d also used this color for the cabinetry in their bathroom so it was the perfect “tie-in” shade to use here. Subway tile was a “must-have” request for the kitchen so I added peel-and-stick subway tile to the small areas above the sink and by the stove. This small and affordable update gave a stylish element to the overall look of the kitchen!
Shop KITCHEN ACCESSORIES


Styling Countertops & Shelves
I like to use trays, cutting boards, or even pieces of slate to group items together on countertops and coffee tables. It helps to corral many small together so it looks cleaner and purposeful. Whenever I can, I’ll also utilize cutting boards to cover up any unused and exposed plugs throughout the kitchen.
There was a blank space above the sink so I added from open shelving which provided more storage and an opportunity to add art and other visually appealing details. Since they love coffee, I used the bottom shelf to incorporate their pour-over coffee pot, kettle, and a pair of beautiful organic cups.
Tip: Remember to work in the “rule of 3” when styling shelves to bring more balance to your eye and establish an aesthetic vibe.

Kitchen Art
This was my first time selecting art pieces specifically for a kitchen so I went with space-appropriate art like dramatic root, vegetable, and fruit prints. I framed them all in black to complement the knobs and handles. When styling I alternated between rich colored prints and some natural-toned ones for a mix of drama and calmness.
Shop KITCHEN ART


Lighting
Updating the cabinets to white made the space feel so much brighter but it still needed some help when it came to lighting. I got battery-powered LED lights and attached them to the bottom of each cabinet. This is such a great way to add more like and give the space an elevated look.
Tip: make sure you add the lights towards the front of the cabinet to avoid only the wall being illuminated.

Catch the entire makeover video below for tips on how I applied the contact paper and more!
XO, MaCenna