A Year Of Renovating Our 110-Year-Old Home
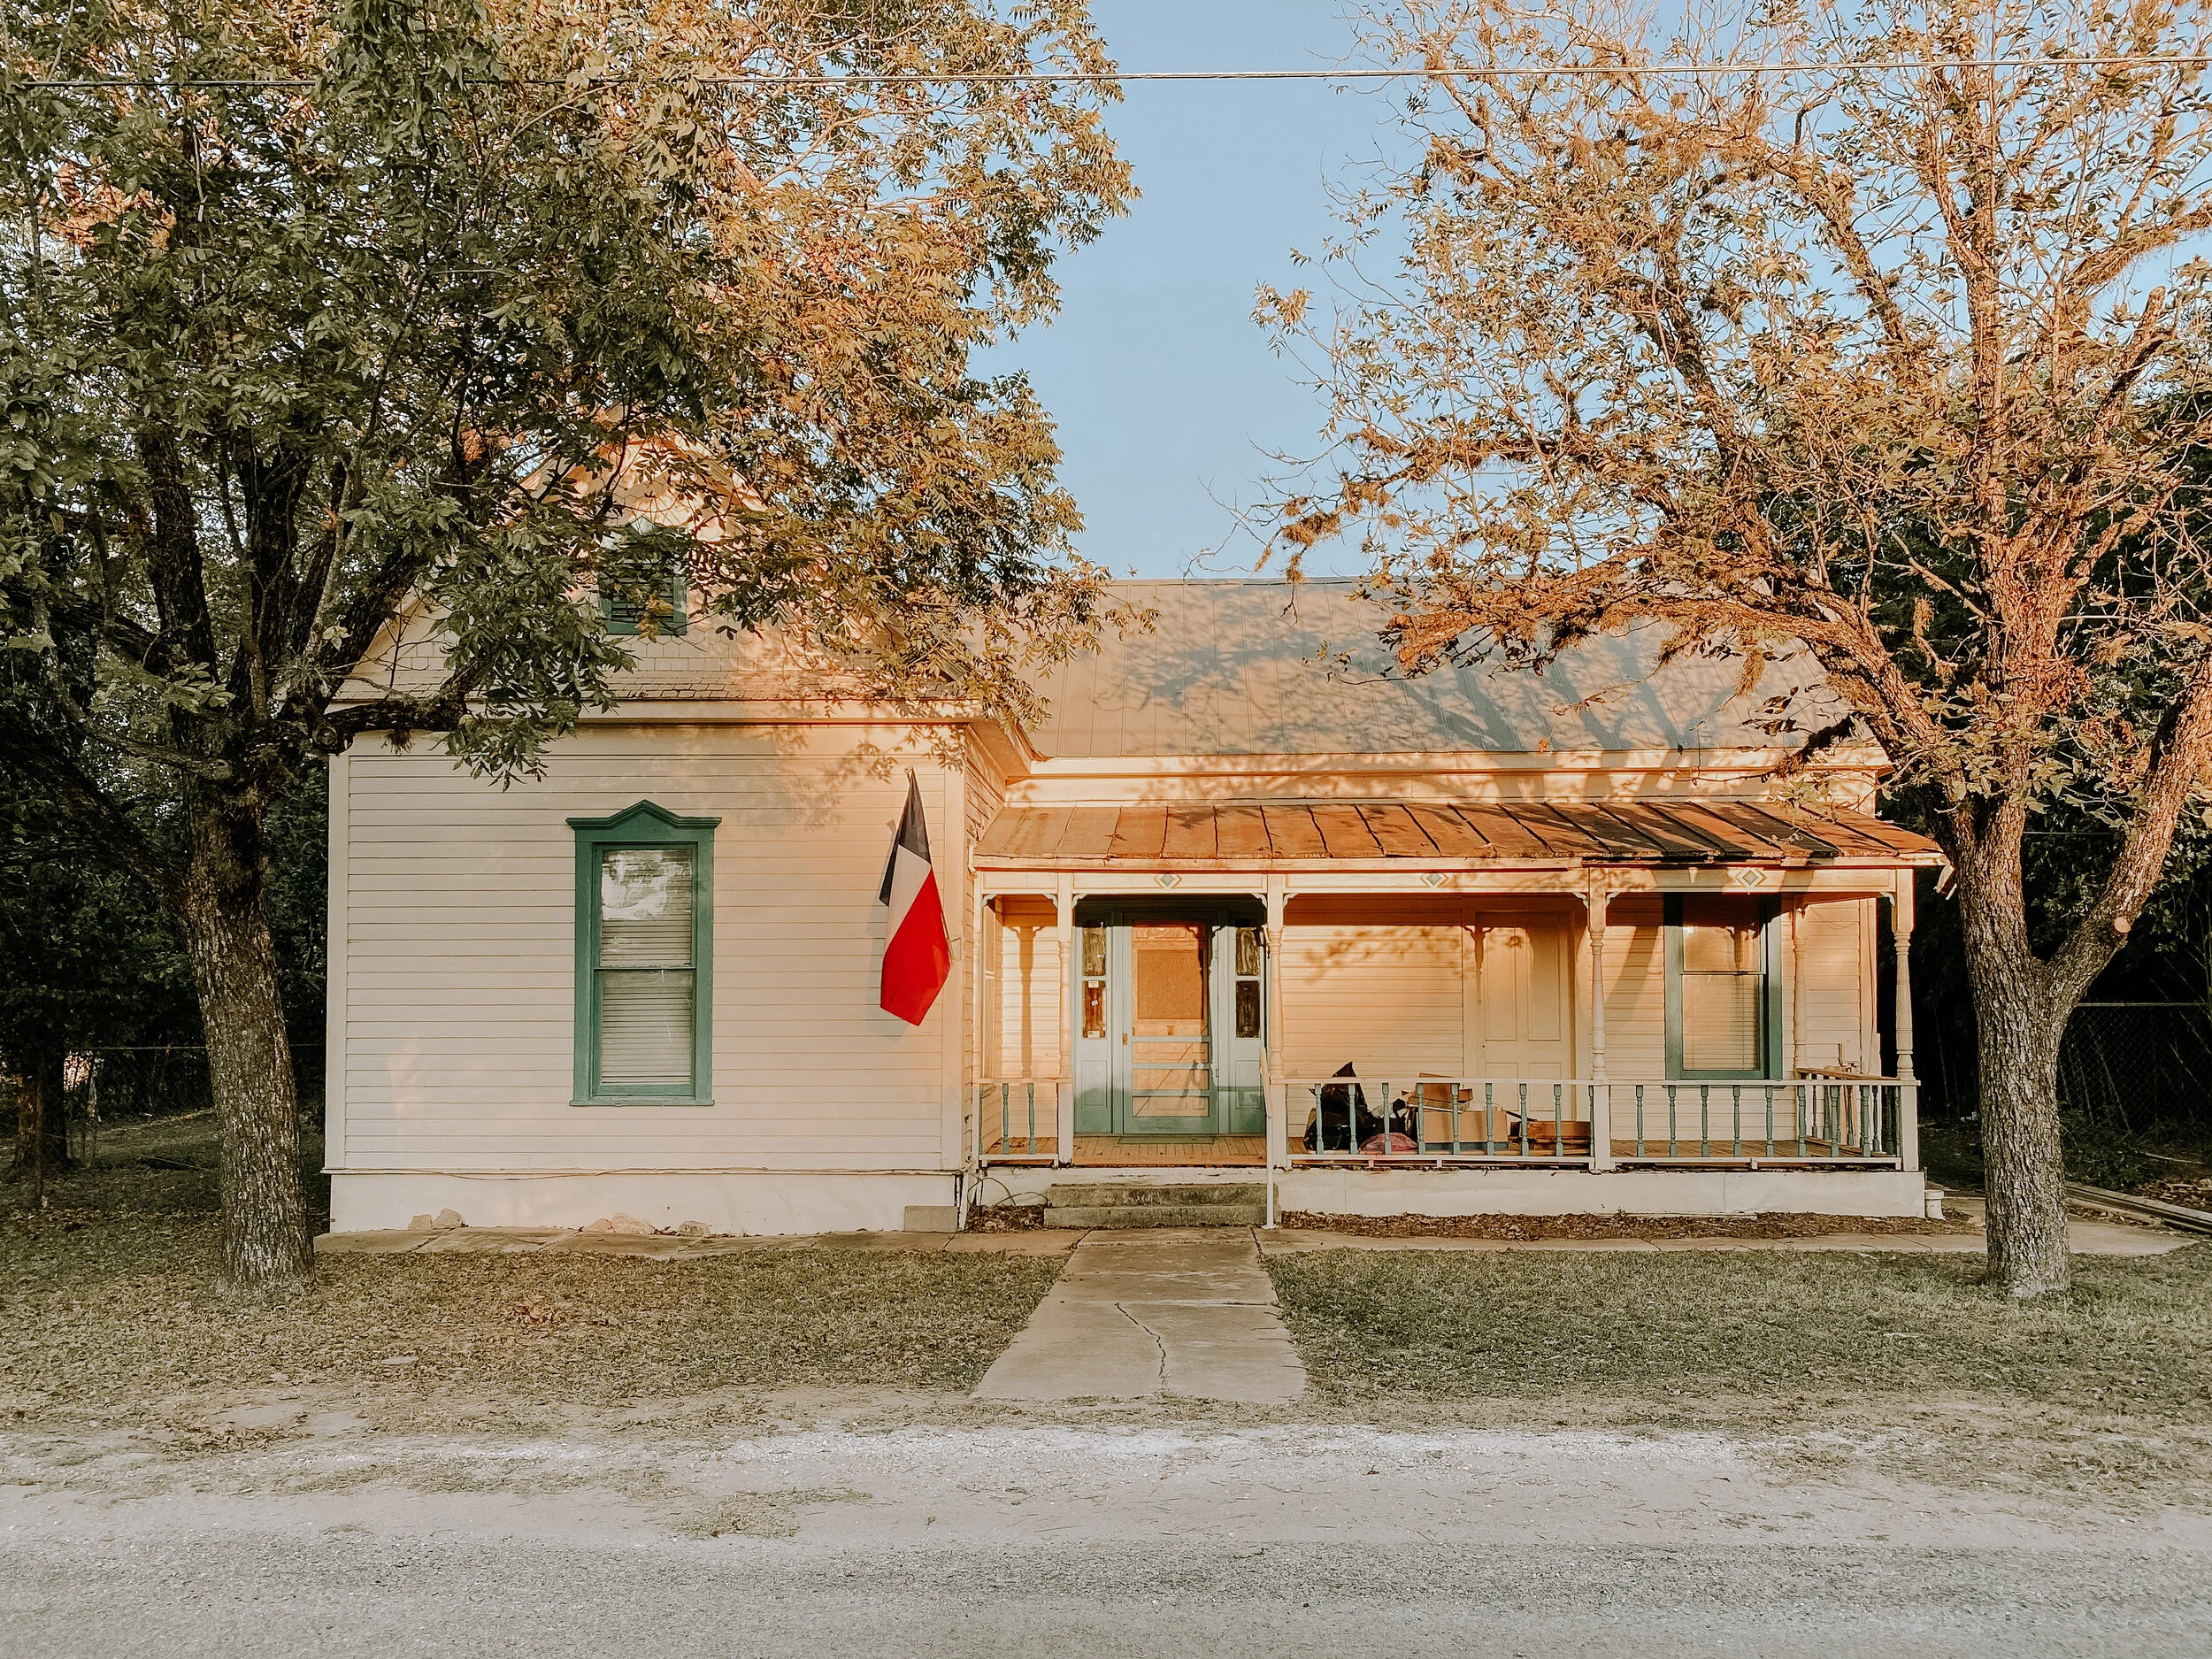
When we drove up to the comfort cottage for the first time the golden sunset was hitting the front of the house just right, the pecan trees were full of leaves and I just knew it was the one. I’ve had such an amazing time learning the in’s and out’s of what it takes to renovate a home in the last year. I knew I wanted to do the majority of the work with this renovation so it was going to take time, research and alot of hard work. Nevertheless, I'm so proud of what we've been able to accomplish and I’m so excited for the house to finally be move-in ready!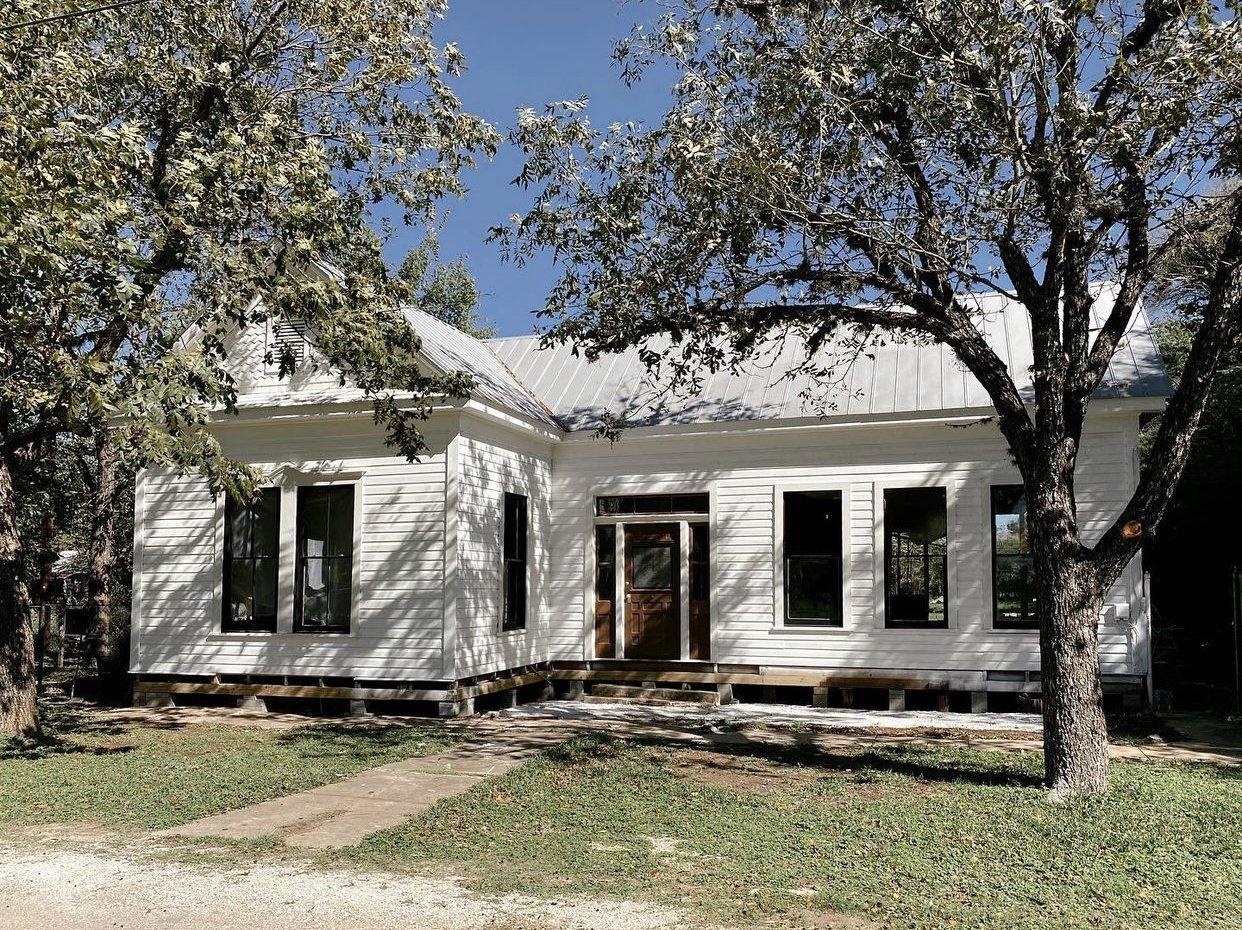
first thing’s first: DEMO
We started this renovation by cleaning up the property and demoing everything ourselves. We tore down all the poorly constructed additions built throughout the years, including a sleeping porch, craft room, hot tub room, laundry room, and even had to remove the porch due to rot. 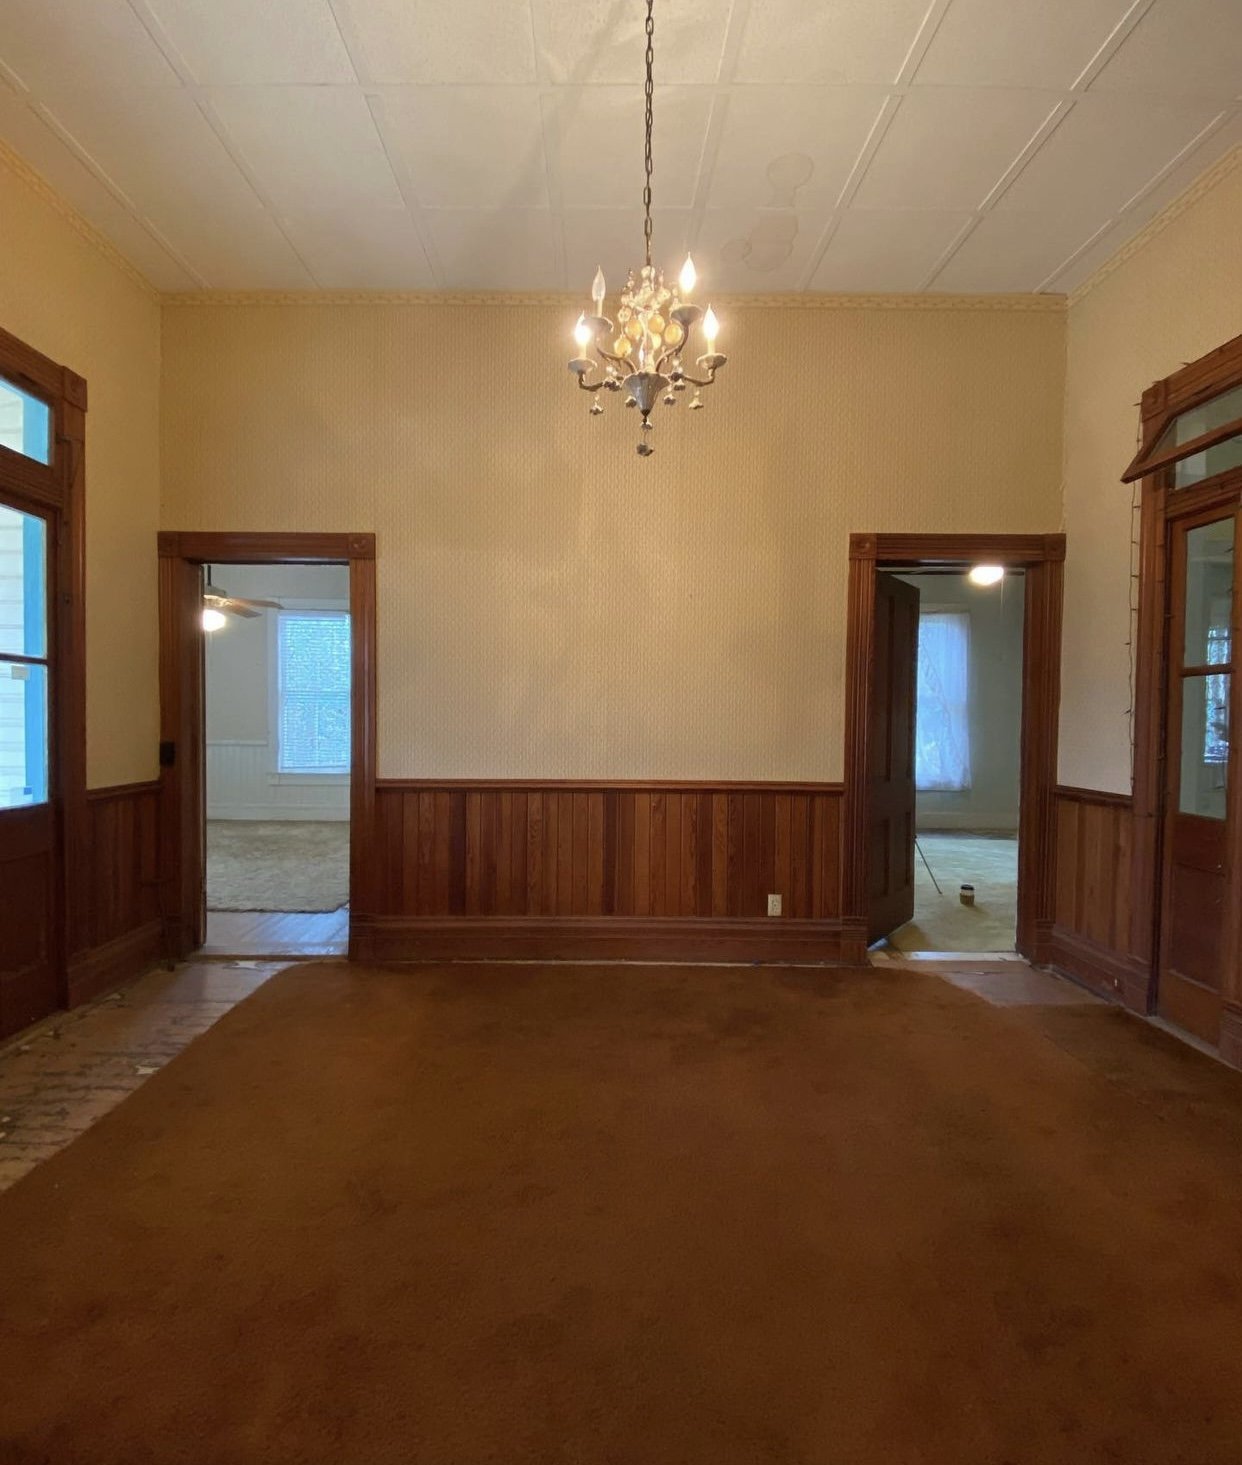
BEFORE

AFTER
Our main goal with this renovation was to salvage everything possible to be reimagined back into the house in some way. During demo we were careful and were able to save almost every piece of wood, beadboard, wainscoting, shiplap board, pine floors, door, window and trim piece! I had plans for these pieces to be reimagined for a better flow, a modernized layout or to make unique details through out our home. We also discovered the wooden floors underneath the laminate tiles, shiplap underneath the acoustic tile, and a piece of original wallpaper found under the sheetrock. I even demo'd the kitchen all by myself! This process was exhausting but also incredibly empowering!
BEFORE

AFTER
planning & inspiration
I really enjoyed the process of designing the new layout of the house. I knew I wanted it to be a 2 bedroom 2 bathroom home so I started by measuring and photographing every room and door to help me draw the existing floorplan of the house. Then I started designing a new floor plan for the house using exisiting exterior walls to minimaze structural changes. I determined where each room would go, how the new layout would flow, where the fireplace and living room would be, and where the windows and doors would be repositioned through out the house. I searched Pinterest for special details I wanted to add to our home like the boxed windows in the kitchen as show below. After we had a plan we got started building!
I couldn't call myself a true DIY'er if I didn't try to build walls myself. One thing I knew I wanted to do myself was attempt to build some interior walls myself! My mom and I tackled the pantry and the back door area, building the 12 ft. walls ourselves. It was such an empowering moment for me! Eventually, though, we hired framers to finish the rest of the job to add structural headers to openings and complete the framing stage faster. They also changed the windows and added new doors to the house's exterior! 
building our 1,000 sq ft addition
Since we removed about 900 sq ft of poorly constructed rooms from the house I wanted to add back that square footage properly. Starting the addition was one of the most exciting moments of the renovation because we got to see the new form of the house and where it would actually be on the property. I knew from the beginning that we weren’t going to DIY the addition ourselves, so we hired tradesmen for foundation, walls, insulation, electrical, and plumbing. 


big restoration projects
While the addition was getting built, it gave me time to tackle some of the restoration projects that were going to be important to our home's integrity. Restoring the century old windows were the largest DIY project this renovation needed and the most time-consuming. Every original window and door is going back in, restored, refinished, and repositioned to where they make the most sense.


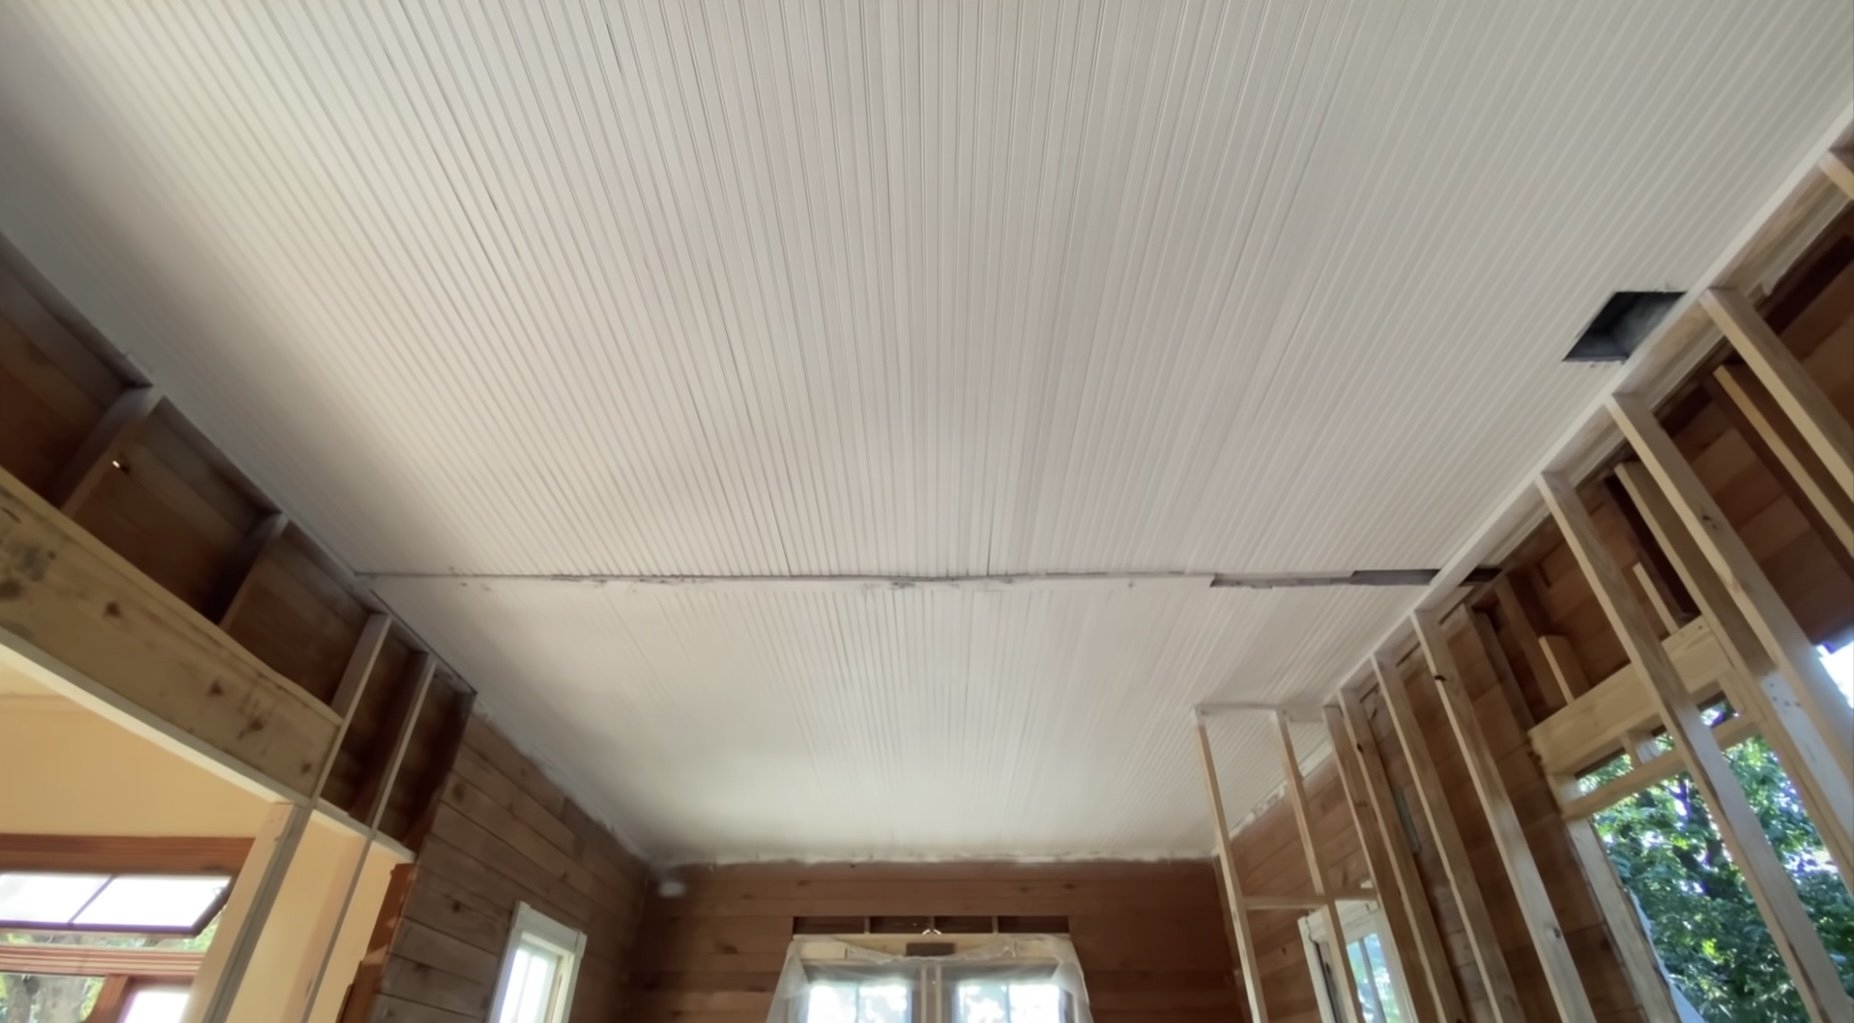
We also added more character to the house by continuing the beadboard ceiling from the kitchen to the dining room. To do this, we used the salvaged beadboard wood from the original walls in the bathroom. This was a massive project over our heads, but it looks incredible and worth the weeks of patching, caulking, priming, and painting the ceiling.
painting the exterior
The final large project that we took on for the year was painting the exterior. One thing I’ve always know is I wanted the exterior for the main cottage to be a fresh but soft shade of white. When it was finally time to make decisions about paint, I swatched 6 shades of paint directly onto the house and ended up going with White Dove OC-17 for the siding and Grey Mist OC-30 for the trim both by Benjamin Moore. We scraped, sanded, powerwashed, primed and painted! 

2022 is going to be filled with renovation updates, more DIY’s, room makeovers and more! Things are happening fast so don’t forget to check back for more updates.xo, MaCenna